Baking Experiences
  • Home
  • Gallery
  • Contact me

Shortbread cookies with salted caramel

3/3/2014

1 Comment

 
Picture
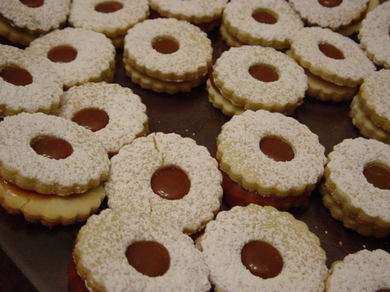
I have found paradise! Kidding... but close...
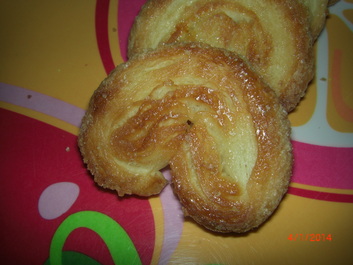
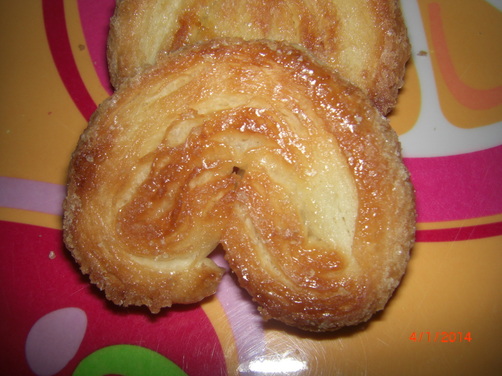
The challenge this weekend was a recipe taken from the French show "Le meilleur patissier" (The best baker). The part that scared me: making caramel. It turned out to be easier than expected and the result is a divine gooey mess, a finger-licking-good sauce that makes you think about finding as many recipes as you can that need caramel.

Ingredients:
For the cookies:
  • 500g flour
  • 250g softened butter
  • 2 tsp vanilla extract
  • 2 egg yolks
  • 140g sugar
For the caramel:
  • 200g sugar
  • 160g heavy cream
  • 60g salted butter, cut in small pieces
Notes:
Although I try and keep the same quantities, some substitutions in the ingredients are unavoidable. For example, finding vanilla sugar here requires a trip to a specialty store.

Sugars are also different: Mainly in the US, it is generally made from sugar cane while it is made from sugar beets in Europe. The refining levels are also different. The original recipe called for powdered sugar. I didn't get it, so I used regular sugar. I loved the result, so no worries...

There are three types of butter in France: unsalted, half-salted and salted, based on the percentage of salt in the butter. Our salted butter is more like the French half-salted, therefore any recipe requiring salted butter will be less salted than the French result. Personally, I don't mind, but if you do...

Picture
Preparation:
I. Make the caramel:
  1. Make sure your pan is very clean. I used a medium sauce pan.
  2. Pour enough of the sugar in a pan to have a thin opaque layer on the bottom. Heat at low/medium heat.
  3. When the layer starts looking slightly transparent, add mode sugar. Keep doing this until all the sugar is in. Do not disturb the sugar with a spoon or anything.
  4. Let the sugar melt. When all the white is gone, you can start using a wooden spoon. Careful, sugar is very hot and can burn!
  5. In the meantime, boil the heavy cream.
  6. When the sugar is all liquid, remove from heat and slowly pour the boiling cream in it, while whisking it.
  7. Put it back on the heat and keep mixing until it thickens a little. A spoon dipped in it should come out covered.
  8. Add the salted butter and stir until thoroughly blended.
  9. Pour into a bowl, cover, let it cool then store in fridge.
Picture
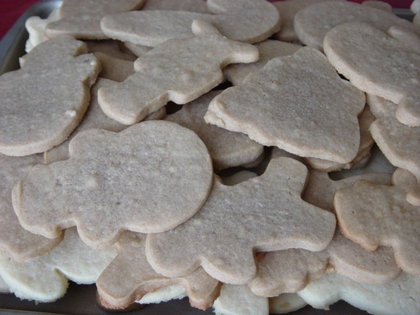
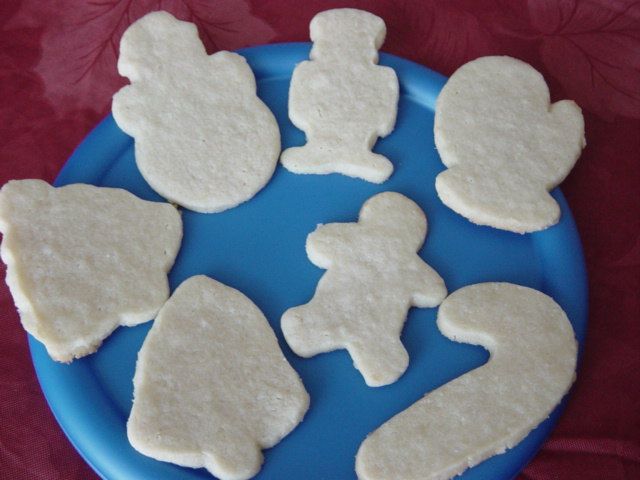
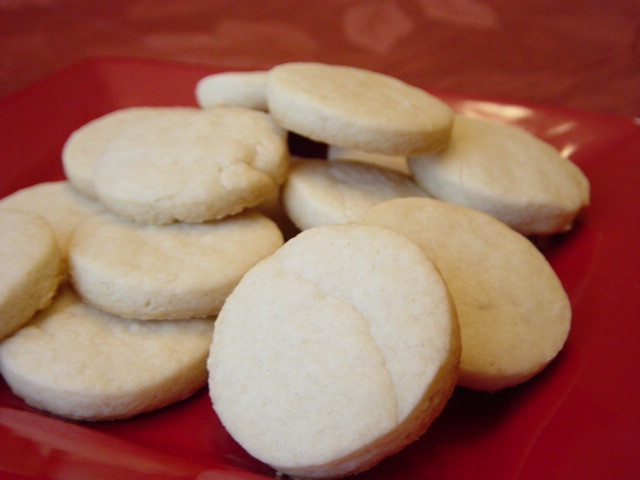
II. Make the cookies
  1. Mix the flour and the butter with your fingers to form a sandy mix.
  2. Add the sugar, vanilla and egg yolks.
  3. Bring the dough together, adding a bit of milk if necessary (I added 1 tbsp).
  4. Film the dough and put in the fridge for 15 minutes.
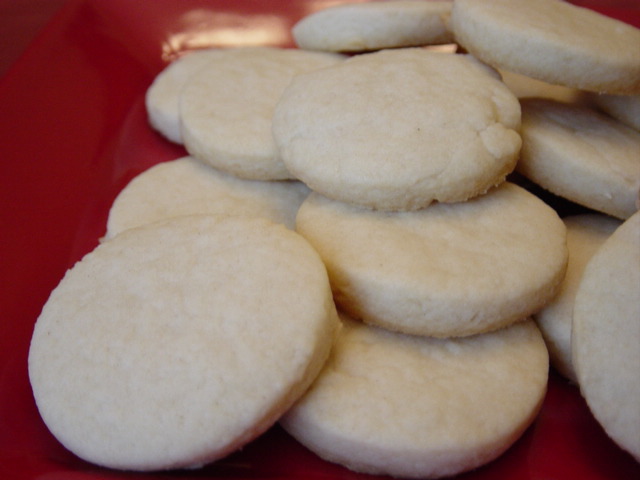
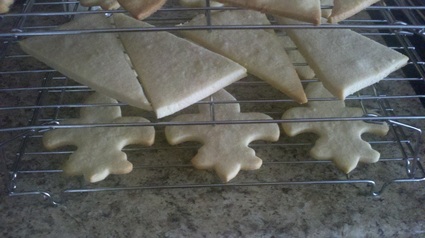
  5. Spread the dough to a 1/8" thick sheet.
  6. Using a cookie cutter, cut the cookies. In half of them, cut a circle in the middle.
  7. Bake at 350 for 9-12 minutes.
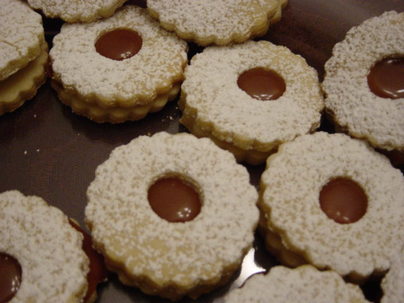
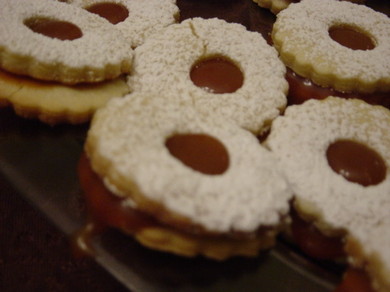
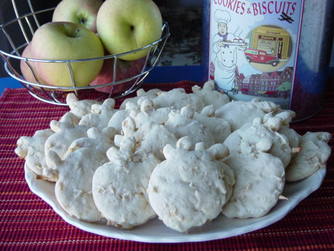
  8. When your cookies cool down, assemble them: put a little bit of caramel (careful, when warming up, it starts running) on the bottom cookie and cover with the top cookie, previously powdered.
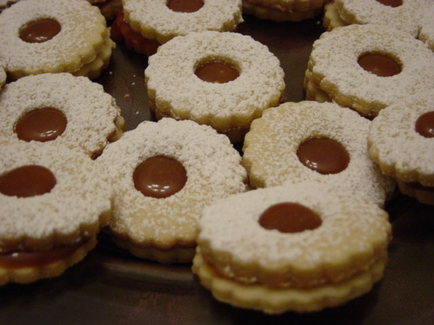
Picture
Enjoy!
Do you have ideas of recipes using caramel?
Share in the comments
.

1 Comment

Palmiers

1/12/2014

0 Comments

 
Picture
When I made the king cake last week (see previous post), I was left with some puff pastry dough, so I decided to make these little palmiers cookies. I just love them! And they were so easy to make too.

Preparation:
  1. Spread your dough in a long rectangle. The length doesn't matter but try to have about 8" in width. More than that and you end up with huge cookies (which might be what you want) but 8" gives you cookies that are about 2-3" big. Square the edges of your rectangle to make folding easier.
  2. Lightly spread sugar all over the surface of your rectangle. I used regular sugar, but you could use cinnamon sugar, maple sugar or brown sugar. The taste will be different, of course, so experiment.
  3. Now the folding. Fold length-wise. Fold both long edges so that they meet in the middle of the rectangle. You end up with a 4" wide rectangle.
  4. Spread some sugar all along the surface.
  5. Fold again length-wise, in the middle. You now have a 2" wide roll.
  6. Cut slices in the roll, about 1/2" wide. The length of the roll determines how many cookies you end up with.
  7. Roll the folded slices in sugar, then place flat on a parchment paper covered cookie sheet. The folding is what gives these cookies their heart shape.
  8. Brush some beaten egg onto the slices.
  9. Bake at 350 degree, about 20 minutes, until golden brown.
  10. Remove from baking sheet and let it cool on racks.
Picture
Special thank you to Sonia for taking the pictures. :-)
0 Comments

Cookie Cake

12/15/2013

0 Comments

 
An easy project this week, a cookie cake. Special request from my daughter for her birthday celebration. I use an old recipe, meaning a recipe someone gave me years ago. From the photocopy, it comes from one of those wrappers around a piece of Wilton bakeware, you know, the ones that have recipes on the back. I have no idea where it came from other than that.
Picture
Ingredients:
  • 1/2 cup butter
  • 1/2 cup granulated sugar
  • 1/4 cup packed brown sugar
  • 1 egg
  • 3/4 tsp vanilla
  • 1 1/2 cups all-purpose flour
  • 1/4 tsp baking soda
  • 1/4 tsp salt
  • 1/2 cup semi-sweet chocolate chips

Preparation
:
  1. Preheat oven to 350 degrees. Spray pan with vegetable pan spray.
  2. In large bowl, cream butter with sugars.
  3. Add egg and vanilla and mix well.
  4. Stir in flour, baking soda and salt, mix well.
  5. Stir in chocolate chips.
  6. Spread dough into  prepared pan with spatula.
  7. Bake 15-20 minutes or until light golden brown.
  8. Cool on rack 5 minutes.
  9. Remove from pan. Cool before cutting and decorating.
  10. Makes 8-10 servings.

Picture
Additional notes:
  • I used royal icing to write on the cake. I had purchased tools to work with melted chocolate but used one of the small bottles for the icing. It actually was more comfortable to write with than a pastry bag.
  • The cookie cake's surface is of course very irregular, so do not expect miracles for the writing.
  • The shape of the cake is also irregular as I used a pretty big pan (a pizza pan) and the dough was a good 1.5 to 2 inches from the edges. The cookie did not expand much and reach the edges. Thus the irregular shape.
  • I baked it for 20 minutes. Next time, I'll probably lower the time to 17 minutes. Good color and good taste, not dry, but I wished for a bit more chewiness.
0 Comments

Sugar cookies

11/25/2013

0 Comments

 
Picture
So, after a short break on the blog – it’s not that I didn’t bake, it’s just that it was such a huge flop I felt ashamed to talk about it – I picked another project for yesterday. I collected two recipes from one of the blogs I mentioned last time (sweetopia.net) and decided to try them. Now, this woman, Marian, does fantastic work with decorating cookies. I’m so jealous... but it also gives me incentive to try. I love the recipe I used before, the sablé recipe (a French recipe), but I wanted to try sugar cookies. Marian had two recipes, one with white sugar and one with brown sugar. So I tried both... :-)

Picture
OK, lessons learned from this:
  • It’s a two-person job!!!! Thank goodness, my friend Mary was there and she didn’t hesitate to jump in. We had lots of great laughs... but it was tough work, whether mixing the ingredients or rolling the dough.
  • This is time-consuming. I mean, counting rest time in the fridge, it took me close to 9 hours and I still have some dough in the fridge. Hmmm, it might not have been the smartest thing to do to do both recipes at once...
  • Cream the butter by itself before anything else, much much easier to mix.
  • Lots of these recipes are made for people who can afford these stand mixers with paddle attachment and others. Mine has two beaters, it doesn’t work as well. I noticed that when directions say to mix the butter and sugar until thoroughly mixed, a minute or so... Yeah it took much longer for me and then the butter gets all caked up into the beaters... and I’m stressing because the recipe says not to overbeat... HELP!!!
  • The  dough warms up VERY quickly and as soon as it warms up a little, it becomes almost unmanageable.  I ended up rolling the dough, putting it in the fridge, using the cookie cutters on the dough, putting it in the fridge, separating the cookies and putting them on a cookie sheet, then fridge, then bake them. Oh, you might want to rearrange your fridge BEFORE starting the whole thing, tough to find room for all those cookie sheets otherwise...
  • I did buy pieces of wood to ensure a more regular thickness in my dough... Of course, they work only if you use them... So my cookies have different thicknesses which matters when you bake them (baking time varies).
  • The taste is good. It is less sweet than these packets you buy in grocery stores. The first taste I got, there was a weird aftertaste on the top of my mouth, in the back. My daughter had the same thing. However, that aftertaste was not there later on at night, so I’ll say it was due to what we had for dinner.
Picture
Quite a few lessons... Next step, icing... But in the meantime, here are some pictures and links to the recipes.

Sugar cookies
Brown Sugar cookies


0 Comments

Halloween treats

11/4/2013

0 Comments

 
Picture
This past weekend was a heavy baking weekend. After the waffles of Friday night, I made Halloween treats for a friend’s Halloween party on Saturday (and brioche bread on Sunday). It was a lot of fun and a challenge for me... although I did bite more than I could chew, leading me to use *blush* shortcuts... However, I still managed to learn something.


I started with Halloween cookies. I used the same recipe as for the French-themed cookies I had made, but had more fun with the decorating. It was far from perfect, mind you, and my hands and arms were killing me by the end BUT it was fun. I really like that cookie recipe but will try and find other types of cookies that can be decorated. I used Halloween-themed cookie-cutters and tried to ice designs on the cookies. There is still more to learn, obviously, but Christmas is almost here with plenty of excuses to make cookies.
Picture
Very cartoonish looking. The features on the ghosts and skulls were made with toothpicks, which does not allow for precise lines. The features of the devils were made using edible marker but the surface of the icing was a bit too bumpy.
For the other treats, I used shortcuts, I admit it. I used boxed mixes for the cakes and really worked on the icing technique. The mini-muffins were pumpkin spice muffins and I made them into brains, following inspirations found online. The cupcakes were chocolate and again, I found inspiration online for mummy cupcakes. All in all, I don’t think they were too bad. I definitely need to work with the consistency of the icing to make it easier to pipe.
Brain mini-muffins
Mummy cupcakes
Tomb brownies
So, for the last couple days, I’ve been looking up online tips to improve my cookie/cupcake decorating techniques and will, hopefully, soon be able to apply them.
Picture
0 Comments

Apple-Cinnamon Cookies

10/16/2013

1 Comment

 
And in the series “how to use all these wonderful apples”, here is another attempt at cookies. This time, I used Winesap apples. They are tart, and delicious!!! This recipe called for only one apple, so I have plenty leftover.
Picture
Picture
The recipe I used was from a French recipe website that I love, but like my previous attempt at apple cookies, the result seems to be light-years away from what the recipe leads me to believe, although there were no pictures here, so maybe not.

Would I qualify this recipe as a success? I am not sure. My daughter LOVED it, so I guess it is a resounding yes from her. My husband said he was indifferent to them, but I noticed he didn’t eat a second one after the first try. As for me, my first reaction was “yum!”, however, after the 4th cookie (over a period of 4 hours!!!! Not all at once!), I was not so enthused anymore. So, here are some thoughts about this recipe.
Picture
  • First of all, is it normal to preheat the oven at a higher temperature than what you will be using it for? If yes, what is the purpose and effect? The recipe called to preheat the oven at 400º but to put the cookies in at 350º.
  • Next, it says the recipe was for 15 cookies but I ended up with 36!!! Now that is a huge difference! And yet, I followed directions. It mentions using a “coffee spoon” (which is the spoon you use to stir your coffee) to put mounds of dough on the baking sheet. Now of course this could be linked to my next note...
  • I think the apple I used was way too big. I mean, afterwards, looking at the apples I had in the basket, I had one that was almost twice the size of another. Same type of apple though. So, when a recipe calls for “one apple”... well, it’s kinda vague. 
  • So, I had lots of apples. This could explain that I had more “dough” than the recipe led me to believe. This could also explain why the dough was so crumbly. I couldn’t form nice-looking mounds of dough (which led to misshapen cookies). And why, the cookies feel soft the next day and fall apart.
  • Finally, I would reduce the amount of cinnamon, it is way too strong. It is also too sweet, so I’d reduce the sugar and probably replace by brown sugar, as someone recommended in the comments for that recipe. However, with this type of apple, you can really taste (texture and taste) the apples. Definitely a recipe to try again.
Picture
1 Comment

Vanilla Bites

10/14/2013

1 Comment

 
In order to save money during this government shutdown, I refuse to buy snacks. So, instead, I try using what I have in my pantry and fridge to satisfy sweet tooth and munching craving.
I asked my daughter to look through my collection of cookie recipes and pick the ones she wanted me to try. She picked these Vanilla Bites, from the Great American Home Baking collection.
Picture
Ingredients:
  • 3/4 cup butter, softened
  • 1/4 cup granulated sugar
  • 2 tsp vanilla extract
  • 2 tsp water
  • 2 cups all-purpose flour
Notes:
  • Although the original recipe called for 18-20 minutes, my first batch, at 18 minutes was too brown.
  • These cookies bake like sugar cookies, you need to look at the bottom edge to see whether they are ready.
  • The taste and texture reminded a friend who tasted them of cookies often given at Christmas. Very similar to shortbread.
  • My daughter did not like them, too dry/crumbly for her. Everybody else liked them ;-)  They would taste fantastic with hot cocoa.
Preparation:
  1. Preheat oven at 350 degrees.
  2. Beat together sugar and butter until light and fluffy. Add vanilla and water, then flour and beat until smooth.
  3. Roll the dough, cover in saran wrap and put in the fridge for 10 minutes.
  4. On a floured surface, use a floured pin to roll the dough the a 1/2 inch thickness. Using a round cookie cutter (1 inch), cut out cookies. Roll the leftover dough and keep making cookies. If necessary, refrigerate the dough in between if it becomes too soft.
  5. Place cookies, 1 inch apart, on a baking sheet covered with parchment paper.
  6. Bake until set and golden, about 15 minutes.
  7. Transfer cookies to a wire rack to let cool. Sprinkle with granulated or powdered sugar if you want.
Picture
1 Comment

Apple cookies

9/27/2013

0 Comments

 
Last weekend, the whole family piled up in the car and we went to an apple festival. It was fun, not huge, but nice anyway. And I did purchase apples. Unfortunately, although I asked the vendor which apples were best for baking, I made the mistake of not taking pictures of the apples with their names. It would have been so much easier than trying to figure out what these apples were and how to use it once they made it home. But I tried...

However, for future reference, I did find these two websites (one and two) that list all the varieties of apples and how to use them. Very useful!

So, with all these apples, I wanted to make a couple of things. More than two, actually, but my husband ate a lot of the apples... they were indeed delicious!

Picture
I wondered if apple cookies existed, so I looked, both on English and French websites. And I found this recipe. It looked really good and the picture made me salivate. However, a word of warning, the end product I got was so far from that picture, that it looks like a different recipe. I have a few ideas as to why, but I’ll come back to that.


Read More
0 Comments

Sables au beurre (butter cookies)

9/6/2013

0 Comments

 
Picture
This week’s challenge: making a few dozen cookies on a French theme for a local event. I wanted to work with a French recipe, easy to make, but challenging me, of course.

So I chose “sablés”, which are dry cookies (sable = sand) that can be shaped by hand, with a knife or with a cookie cutter. The recipe is fairly simple and does allow for slight variations of taste (adding lemon juice, lemon zest, orange juice). The beauty of these cookies is that you can use your imagination in the decorating.

Recipe for the cookies

Picture
Ingredients:
  • 1 egg
  • 120g of sugar
  • 1 packet of vanilla sugar or 1 tsp of vanilla extract
  • 250g of flour
  • 125g of softened butter

Preparation:
  1. Mix in a large bowl: the egg, a pinch of salt, the sugar and the vanilla. Mix with a wooden spoon until pale and creamy.
  2. Add the flour then mix with your fingers until it looks/feels like sand.
  3. Add the butter and mix until you get a dough.
  4. Hit the dough by throwing it from hand to hand until you get an homogenous ball. If the dough is too fat or soft, add a bit of flour.
  5. Wrap the dough in saran wrap and let it rest in the fridge for 30 minutes.
  6. Put some flour on a flat surface and on your rolling pin, then spread the dough until ¼” thick.
  7. Cut your cookies, using a knife, cookie cutter or glass.
  8. Put the cookies on a cookie sheet covered with parchment paper.
  9. Bake in a 350 degree oven for 12-15 minutes (until the edges start to VERY SLIGHTLY brown.

By tripling the recipe, I got around 46 cookies (2 different shapes), counting the ones that were not fit for company. I ended up with 42 "useable" ones. Note that my cookies are fairly big (5" tall and 3" wide at their largest).

Read More
0 Comments

Rochers (coconut macaroons)

9/3/2013

2 Comments

 
First of all, I apologize. It's been 10 days since I posted. I've been busy, mind you, but didn't do anything new that warranted posting. I did make more of the faluche, as my daughter wanted some individual ones to make as sandwiches to take to school, but didn't get around to something else until today. So here it is!
Picture
This morning, I made "rochers", a Belgian specialty one can now find anywhere. Although I don't make them often, they are a favorite with my daughter and her friends. They are very sweet and sticky, so one cannot eat many at a time (which I guess is a good thing! ;-D ).

Recipe

Ingredients:
  • 1 bag of unsweetened shredded coconut (14 oz.)
  • 1.5 cup of sugar
  • 4 egg whites
  • 1 tsp of almond extract
  • 1 tsp of vanilla extract

Preparation:
  1. Preheat oven at 350 degrees.
  2. Mix all ingredient in a bowl until well blended.
  3. Form small balls (1.5 in) and place on a baking sheet covered with parchment paper.
  4. Bake for 15 minutes.
  5. Let it cool on a cooling rack (I just pulled the parchment paper onto the cooling rack).


Notes:
  • Next time, I will probably reduce the amount of sugar to 1 cup or make sure I use unsweetened coconut. I will also mix with 3 egg whites and only add the 4th if I need more binding.
  • You can replace the almond and vanilla extract with any kind of extract you like that would be compatible with coconut. I used what I had on hand.
  • When baking, you will see the sugar and egg whites spread, so that when baked, each rocher will have a "collar". I used a 2" round cookie cutter to remove that "collar", but wait until your cookies are completely cool.
  • It is hard to determine when it is ready as the top browns but the inside stays gooey. I made the mistake of putting two sheets together in the oven and a couple cookies did not cook properly.
Picture
2 Comments
<<Previous

    Enter your email address:

    Delivered by FeedBurner

    RSS Feed

    Table of Content

    Articles listed by date (available soon)

    Archives

    October 2014
    March 2014
    February 2014
    January 2014
    December 2013
    November 2013
    October 2013
    September 2013
    August 2013
    July 2013
    June 2013

    Categories

    All
    Almond Cream
    Apples
    Apple Sauce
    Banana
    Basic Cake
    Bread
    Brownies
    Cake
    Cannoli
    Caramel
    Chocolate
    Cinnamon
    Coconut
    Cookies
    Crepes
    Cupcakes
    Filling
    Frosting
    Fruit
    Icing
    Louisiana
    Madeleine
    Mardi Gras
    Meringue
    Mousse
    Muffins
    Orange
    Pastry Cream
    Pie
    Pop
    Pudding
    Puff Pastry
    Puff Pastry
    Savory
    Shortbread
    Specialty Bread
    Strawberry
    Sugar
    Tartlet
    Vanilla Cream
    Waffles
    Whip Cream
    Zucchini

    Author

    My name is Anne-Sophie and I've always enjoyed baking. I've decided to try and spend more time trying new recipes and would like to share the journey. I am particularly (but not exclusively) interested in French/Belgian recipes.


Powered by Create your own unique website with customizable templates.