Baking Experiences
  • Home
  • Gallery
  • Contact me

Croustade gersoise

2/23/2014

0 Comments

 
While watching a French pastry competition, the candidates were required to make this croustade. Traditionally, the dough is stretched really thin over a large table, then rolled with the filling and then as a spiral (although comments on the recipe from people of that area say that the spiral shape was not typical). Needless to say, there was no way I would ever do that, I'm not crazy!
Picture
Then one day, while looking through cooking/baking blogs, I came across this recipe. The author of the blog proclaims proudly to be a modern woman and using modern ingredients to make her life easier.

And so, I decided to try it. I liked the idea of working with phyllo and the look of it, in my mind, allowed for the unavoidable tears in phyllo dough. So here I go.

The results were mixed and there is lots of room for improvement but here are some notes.
APPEARANCE:
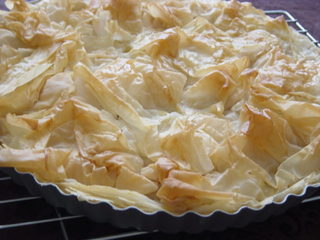
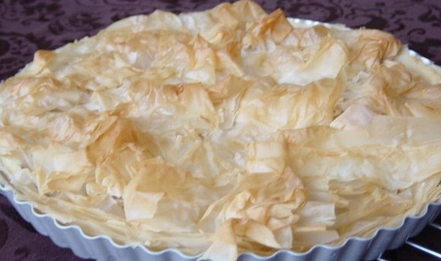
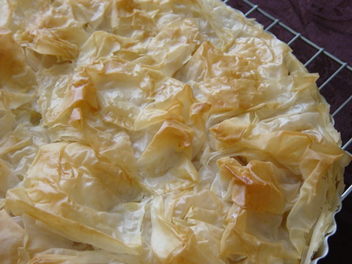
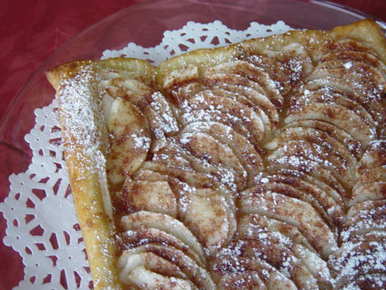
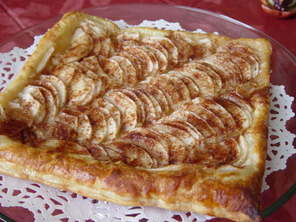
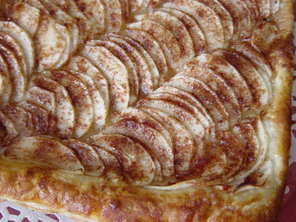
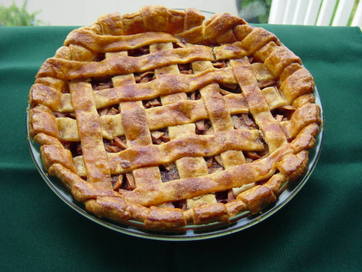
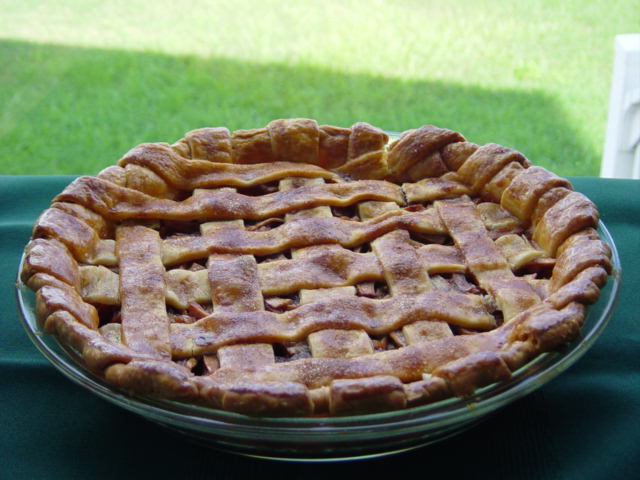
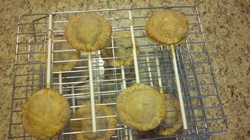
  • It looked beautiful! I just loved the top of the pastry, golden, delicate. It just was very pretty.
  • I wonder if I put too much phyllo dough on the top and that's why it is not more uniform in the color.
TASTE:
  • My daughter and I thought the taste of the orange blossom water was too strong, overpowering. I followed the recipe except I didn't use armagnac. Does this alter the taste of the orange blossom water? I don't know, but it was strong.
  • On the other hand, my husband thought the taste was pretty bland. Go figure!
Picture
Notes:
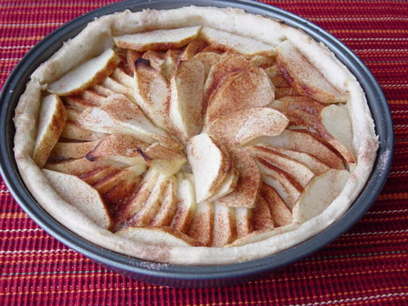
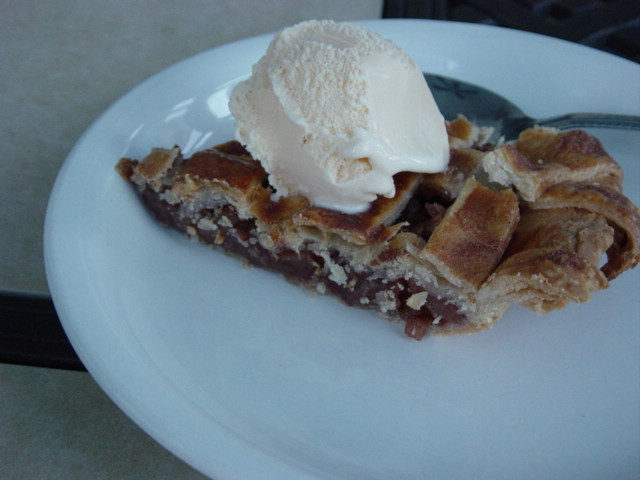
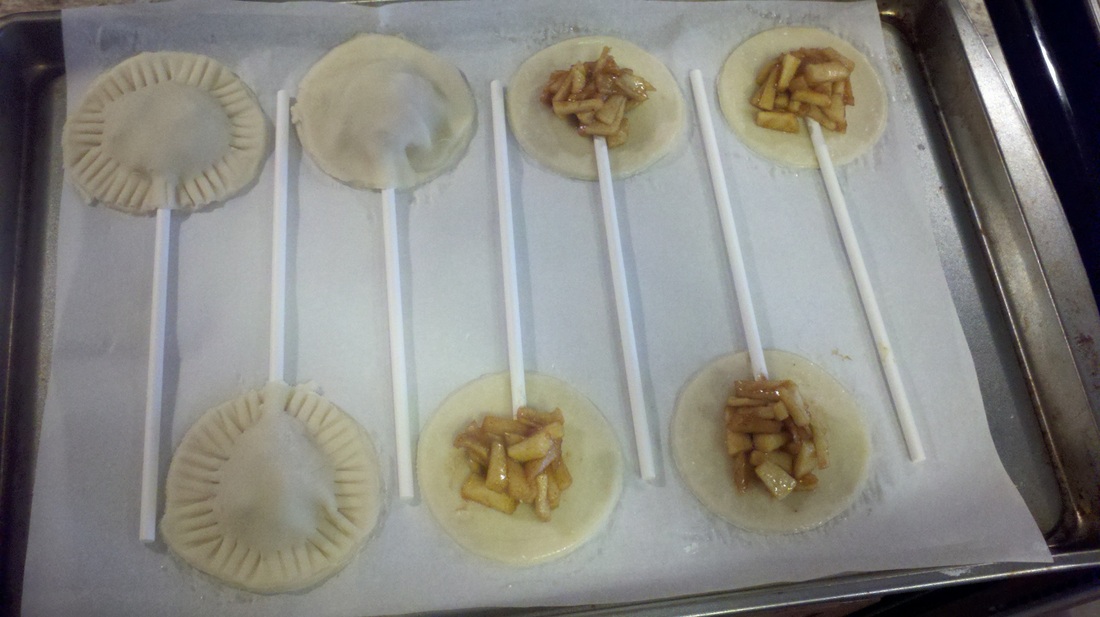
  • I used the listed number of apples but ended up with only one layer of apples. Compared to the amount of phyllo dough, that might explain the blandness. I don't know if I used too big of a pie pan, but that needs to be rectified.
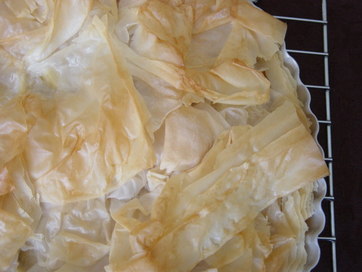
  • I think I used too much phyllo. I know I used more than the recipe called for. Part of it is because the sheets came apart pretty much as soon as I opened the package. I got lucky to find some sheets torn only on edges to be able to make the bottom of the pie but otherwise, it was just pieces.  The top was really fluffy, maybe too much since the layers inside were rather white...
  • I realized I forgot to use the sugar... Oooops!
  • I had to bake it for 30-35 minutes instead of the 15-20 minutes mentioned in the recipe, just to get to the color. Again, is it due to the layer of phyllo?
Picture
Next time:
  • I'll use less orange blossom OR replace it with vanilla or even add cinnamom.
  • I'll use less phyllo... :-)
  • See about using a different pie pan.
  • Use more apples.
Picture
What about your experiences with phyllo dough?
0 Comments

Sugar pie

12/8/2013

0 Comments

 
I love this time of year! I love decorating my house for Christmas and I go crazy! I dream of making tons of cookies and decorating them... Notice how I said “dream”? Yes, with my last batch of cookies, I seriously hurt my hands trying to ice them. Hard to imagine, I know, that icing could be a dangerous job, but there you have it. I started decorating with white icing and had to wait for it to dry before starting on color. Well, that never got done. My hands still hurt, almost two weeks later, and unfortunately, my job requires me spending my days in front of the computer, which doesn’t help...

But enough whining, I did manage to do some baking during this past holiday, but forgot to take a picture. I made a sugar pie, a traditional pie from Belgium. It tasted good, but always better the next day. I’m not sure I enjoyed the almonds too much though.

Another aspect of baking I need to work on is the crust. Not the recipe itself, it’s the Flemish piecrust (with yeast), but the baking. I don’t know if I’m using the wrong pan (9” pie pan) but I seem to have such a big edge to this pie and it gets too brown during the baking. I tried covering it with foil but I think I’ll invest in one of those pie edge protectors.

With my husband making his pumpkin pie and a friend making a pumpkin cake, my pie was not the most popular, except for me since *gasp* I don’t like pumpkin... but my daughter did help me finish it in the following days.

I think I will definitely remake one, probably during my Christmas break...

0 Comments

Apple Pie (part 2)

10/7/2013

0 Comments

 
Have you ever noticed how, when you get interested in something, all of a sudden you see that something everywhere? I got interested in apples and all cooking shows, blogs, etc., seem to be bursting with apple recipes. Granted, ‘tis the season, but still...

So, one of these cooking shows, “Kelsey’s Essentials” (not one I watch religiously but that I enjoy when I catch it), had this easy apple and pear pie. I decided to make it today, using the McIntosh apples I bought last week.

The dough for this pie is a store-bought fillo dough, not one made from scratch. I feel like I’m cheating, but I was also curious to taste an apple pie with fillo dough. I never had that. And I can say the result was EXCELLENT!!!
Picture
Ingredients:
  • 1 fillo dough sheet (there are two in the package), thawed.
  • 2-3 apples, depending on the size
  • 1-2 tbsp of butter, melted
  • 2 tbsp of light brown sugar (dark brown or regular sugar can be used too)
  • ½ tsp of cinnamon
  • 2 tbsp of honey, warmed


Preparation:
  1. Cut your apples in small slices. Don’t worry if they are not perfect or if they break, you’ll need these little pieces. Sprinkle some lemon juice on them to prevent browning.
  2. Preheat your oven at 400 degrees.
  3. Sprinkle some flour on your work surface. Spread the sheet of fillo dough on it. Sprinkle some flour on top. Using your rolling pin, blend in the creases. 
  4. Cover a baking sheet with parchment paper. Transfer the dough onto the baking sheet.
  5. With a fork, pierce the dough, forming a square ½ inch from the edge of the dough. Then, prick the dough throughout the inside of the square, like for a regular pie. This prevents the dough within the square from rising. The edges will rise, forming the crust of the pie. Make sure you prick in the corners of the square too.
  6. Then, place your apple slices inside that square. Start at one corner and place them in a line towards the opposite corner on a diagonal. Repeat the process on each side until the whole square is filled. Use smaller pieces to fill in the spaces. Try and make it look as attractive as possible. Keep your slices tight and close to each other.
  7. Brush the apples with the melted butter. Not too much! The original recipe called for 3 tbsp. I have leftover butter. So I reduced to 2 tbsp, but it’s still too much. You just need to wet the apples.
  8. Mix the sugar and cinnamon and sprinkle on the apples. It is up to you how much you want. Again, the original recipe called for much more than what I listed and I did not use it all. It does bring color to the pie but you don’t want the apple taste to be overwhelmed.
  9. Put in the oven for 15 minutes.
  10. Put the honey in a microwave safe bowl and warm for a few seconds. Brush the honey on the apples and edges and put in the oven for an additional 5 minutes.
  11. Let it cool on a cooling rack.
  12. Serve with some mascarpone, whipped cream or vanilla ice cream.
Picture
Picture
0 Comments

Apple pie

10/1/2013

0 Comments

 
Before I start on this one, I would like to say it is important to have the right tools to bake. I mean, sometimes, you can substitute something for something else, but as I found out with this recipe, using a round 9" cake pan instead of the 12" pie pan required by the recipe was not a good idea, in terms of appearance (taste was fine). So be warned, the pictures do not do justice to the pie and a large pie pan is now on my wishlist...
Picture
For the dough, I used this recipe by Chef Simon. This is a basic pâte brisée. Amazingly enough, there is no sugar in the dough. Now, I don't know, if I had used a proper pie pan, if that would have made a difference, but here, we really wanted a bit more sweet. This is a dough meant to be used with a humid filling, sweet or savory. I forgot to brush the top of the dough with milk or eggs, so it does appear a bit pale.

As for the apples, I know they were not of the Delicious kind, but rather a type that was more for baking and sauces. They were really not attractive apples (but fine-tasting nonetheless). They were quite large and that combined with the smaller pan size explains why the placement of the apples looks a bit messy.

I did bake the pie for 5 minutes more than the 20 minutes recommended but there was still a slight crunch to the apples. It was good but I didn't know what the final product was supposed to look/feel like.
Picture
A friend of mine was there and she mentioned never having seen an apple pie like that, being used to the typical American pie, covered with dough. I will definitely redo this one though, working on presentation as well as improving the taste as much as I can. It was a pretty quick recipe to make, so definitely one to keep.
0 Comments

Tartes aux fruits

8/19/2013

1 Comment

 
Picture
Challenge this week: still work on pie crusts and expand. I decided to go for a traditional Belgian pie crust, and practice the "crème pâtissière", this vanilla cream one finds in pies and éclairs. I also took the opportunity to practice more on my piping with a homemade whip cream.

Read More
1 Comment

Apple Pie a la mode

7/4/2013

0 Comments

 
Picture
Using the ready-made refrigerated pie crusts, I decided to make an apple pie today. Appropriate, isn't it, for the 4th of July?
If you remember, when I made the apple pie pops, I thought the filling came out pretty good and that I'd try it for a regular pie, so TA DAAAA!
I was really happy with the result, especially when served with a scoop of French vanilla ice cream. Yum!

Picture
Picture
0 Comments

Apple Pie Pops

6/24/2013

1 Comment

 
Picture
Experience of the day: Apple Pie Pops. My daughter and I saw that on "My Fair Wedding with David Tutera" and thought to try it. I looked for a recipe and found one on bhg.com.
Results: good dough, good filling but a bit dry in the mouth. You really want something to drink afterwards. I think it's because the ratio dough/filling is off, there is too much dough for the amount of filling. So, I'll keep the recipe for the filling and go back to traditional pies...

1 Comment

    Enter your email address:

    Delivered by FeedBurner

    RSS Feed

    Table of Content

    Articles listed by date (available soon)

    Archives

    October 2014
    March 2014
    February 2014
    January 2014
    December 2013
    November 2013
    October 2013
    September 2013
    August 2013
    July 2013
    June 2013

    Categories

    All
    Almond Cream
    Apples
    Apple Sauce
    Banana
    Basic Cake
    Bread
    Brownies
    Cake
    Cannoli
    Caramel
    Chocolate
    Cinnamon
    Coconut
    Cookies
    Crepes
    Cupcakes
    Filling
    Frosting
    Fruit
    Icing
    Louisiana
    Madeleine
    Mardi Gras
    Meringue
    Mousse
    Muffins
    Orange
    Pastry Cream
    Pie
    Pop
    Pudding
    Puff Pastry
    Puff Pastry
    Savory
    Shortbread
    Specialty Bread
    Strawberry
    Sugar
    Tartlet
    Vanilla Cream
    Waffles
    Whip Cream
    Zucchini

    Author

    My name is Anne-Sophie and I've always enjoyed baking. I've decided to try and spend more time trying new recipes and would like to share the journey. I am particularly (but not exclusively) interested in French/Belgian recipes.


Powered by Create your own unique website with customizable templates.