Baking Experiences
  • Home
  • Gallery
  • Contact me

Sugar pie

12/8/2013

0 Comments

 
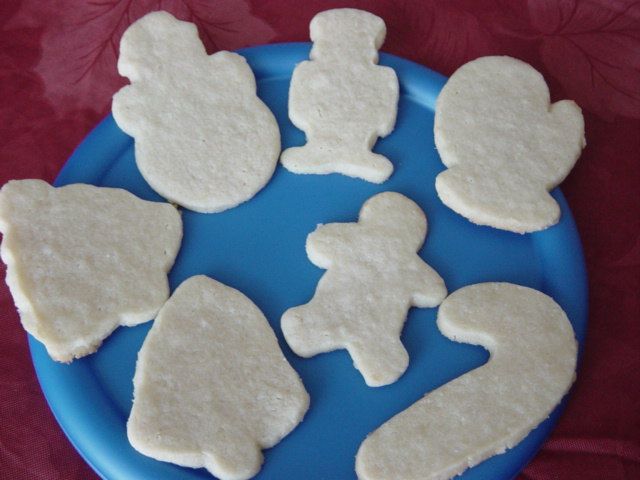
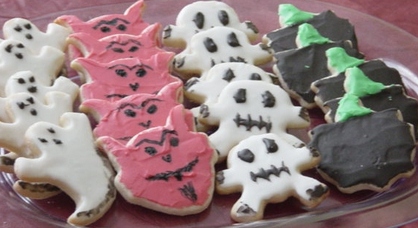
I love this time of year! I love decorating my house for Christmas and I go crazy! I dream of making tons of cookies and decorating them... Notice how I said “dream”? Yes, with my last batch of cookies, I seriously hurt my hands trying to ice them. Hard to imagine, I know, that icing could be a dangerous job, but there you have it. I started decorating with white icing and had to wait for it to dry before starting on color. Well, that never got done. My hands still hurt, almost two weeks later, and unfortunately, my job requires me spending my days in front of the computer, which doesn’t help...

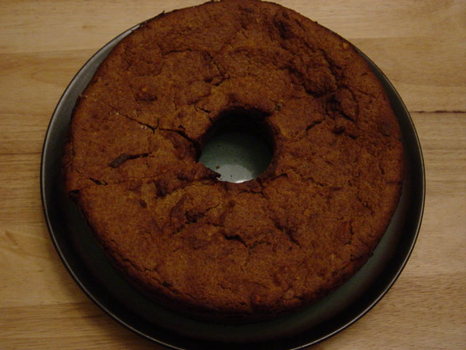
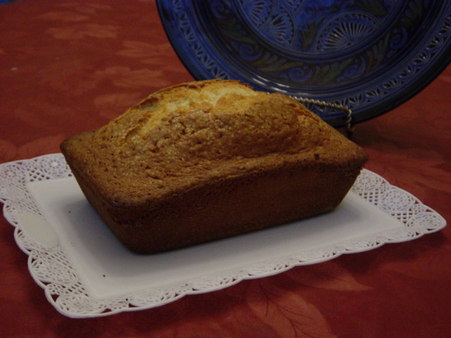
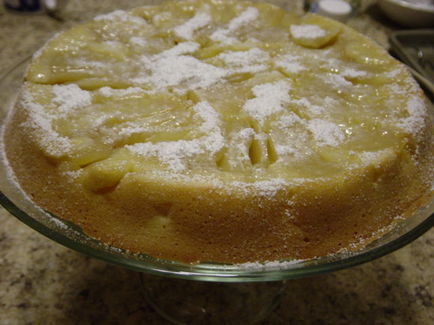
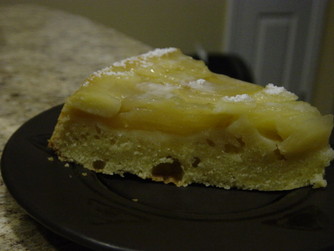
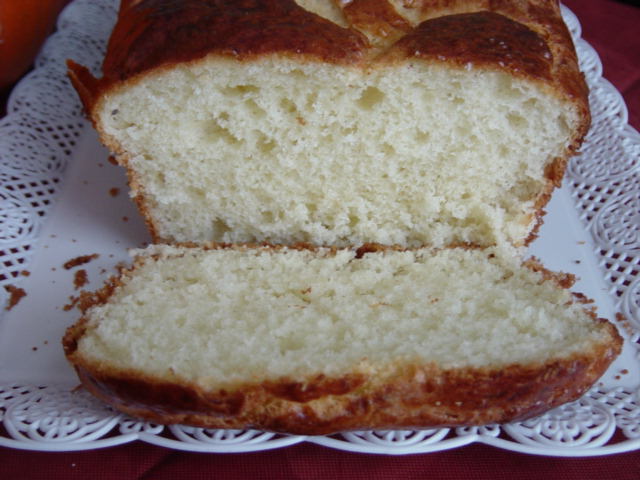
But enough whining, I did manage to do some baking during this past holiday, but forgot to take a picture. I made a sugar pie, a traditional pie from Belgium. It tasted good, but always better the next day. I’m not sure I enjoyed the almonds too much though.

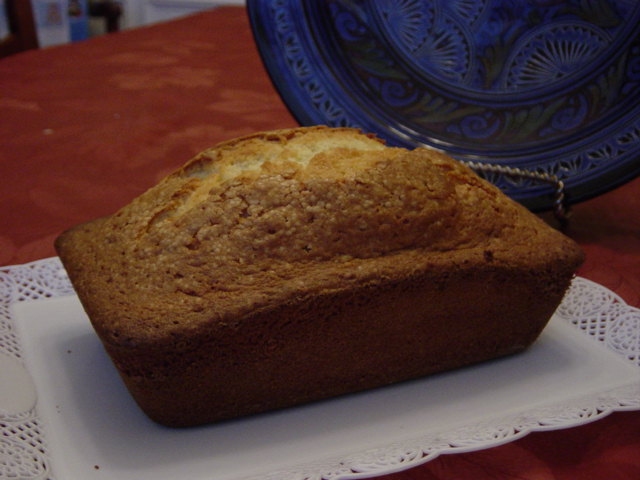
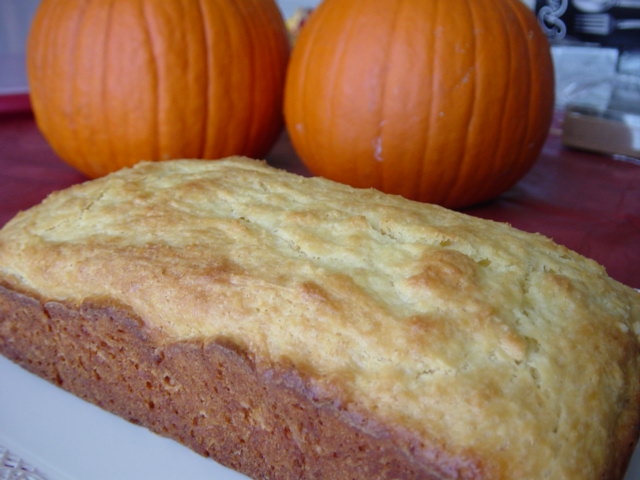
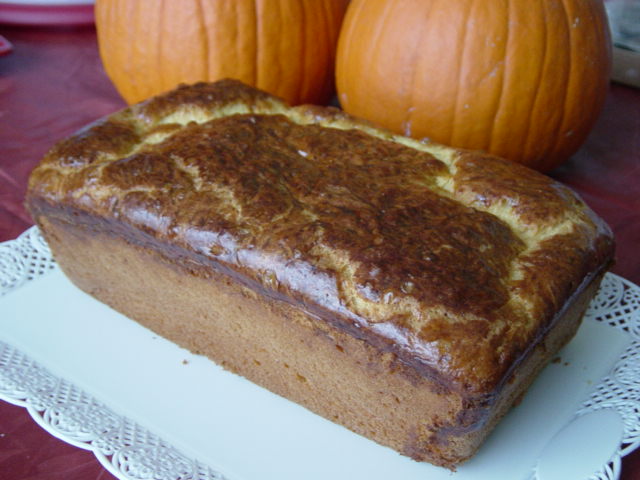
Another aspect of baking I need to work on is the crust. Not the recipe itself, it’s the Flemish piecrust (with yeast), but the baking. I don’t know if I’m using the wrong pan (9” pie pan) but I seem to have such a big edge to this pie and it gets too brown during the baking. I tried covering it with foil but I think I’ll invest in one of those pie edge protectors.

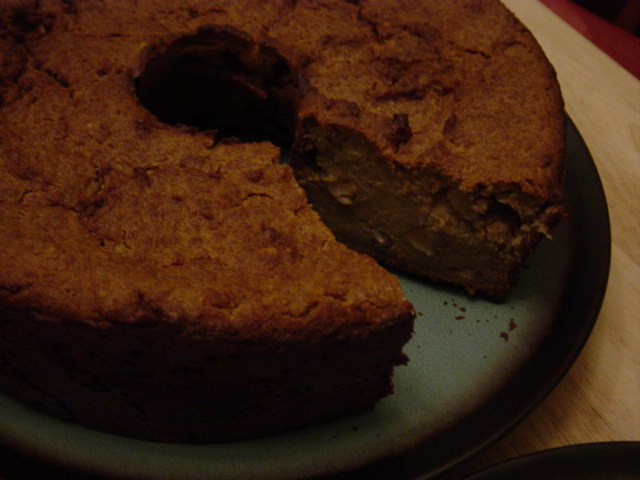
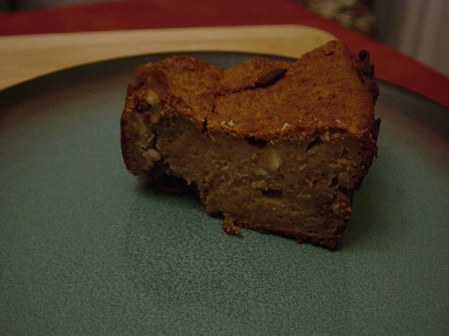
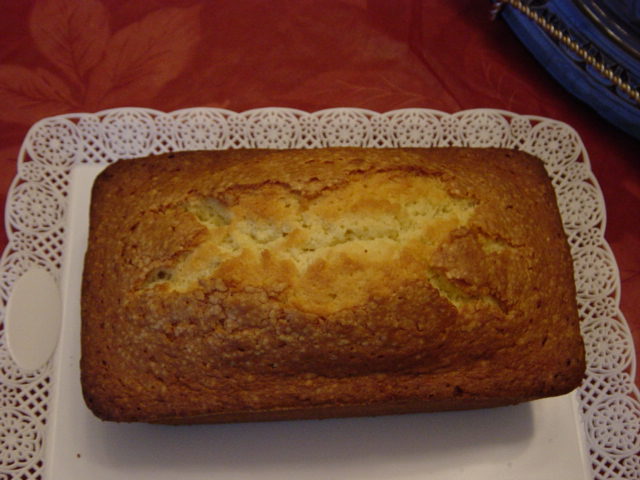
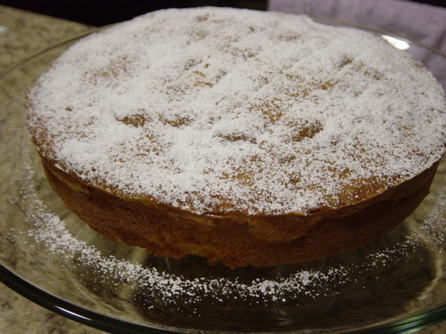
With my husband making his pumpkin pie and a friend making a pumpkin cake, my pie was not the most popular, except for me since *gasp* I don’t like pumpkin... but my daughter did help me finish it in the following days.

I think I will definitely remake one, probably during my Christmas break...

0 Comments

Sugar cookies

11/25/2013

0 Comments

 
Picture
So, after a short break on the blog – it’s not that I didn’t bake, it’s just that it was such a huge flop I felt ashamed to talk about it – I picked another project for yesterday. I collected two recipes from one of the blogs I mentioned last time (sweetopia.net) and decided to try them. Now, this woman, Marian, does fantastic work with decorating cookies. I’m so jealous... but it also gives me incentive to try. I love the recipe I used before, the sablé recipe (a French recipe), but I wanted to try sugar cookies. Marian had two recipes, one with white sugar and one with brown sugar. So I tried both... :-)

Picture
OK, lessons learned from this:
  • It’s a two-person job!!!! Thank goodness, my friend Mary was there and she didn’t hesitate to jump in. We had lots of great laughs... but it was tough work, whether mixing the ingredients or rolling the dough.
  • This is time-consuming. I mean, counting rest time in the fridge, it took me close to 9 hours and I still have some dough in the fridge. Hmmm, it might not have been the smartest thing to do to do both recipes at once...
  • Cream the butter by itself before anything else, much much easier to mix.
  • Lots of these recipes are made for people who can afford these stand mixers with paddle attachment and others. Mine has two beaters, it doesn’t work as well. I noticed that when directions say to mix the butter and sugar until thoroughly mixed, a minute or so... Yeah it took much longer for me and then the butter gets all caked up into the beaters... and I’m stressing because the recipe says not to overbeat... HELP!!!
  • The  dough warms up VERY quickly and as soon as it warms up a little, it becomes almost unmanageable.  I ended up rolling the dough, putting it in the fridge, using the cookie cutters on the dough, putting it in the fridge, separating the cookies and putting them on a cookie sheet, then fridge, then bake them. Oh, you might want to rearrange your fridge BEFORE starting the whole thing, tough to find room for all those cookie sheets otherwise...
  • I did buy pieces of wood to ensure a more regular thickness in my dough... Of course, they work only if you use them... So my cookies have different thicknesses which matters when you bake them (baking time varies).
  • The taste is good. It is less sweet than these packets you buy in grocery stores. The first taste I got, there was a weird aftertaste on the top of my mouth, in the back. My daughter had the same thing. However, that aftertaste was not there later on at night, so I’ll say it was due to what we had for dinner.
Picture
Quite a few lessons... Next step, icing... But in the meantime, here are some pictures and links to the recipes.

Sugar cookies
Brown Sugar cookies


0 Comments

Banana Cupcakes

11/14/2013

0 Comments

 
Picture
This week’s project: cupcakes and frosting. I just love bananas and had to find a recipe for a banana cupcakes (so I’d have the excuse of practicing frosting). I mean, I could have gone for any type of cupcakes, I could even have picked a box, just to have a canvas to practice frosting, but I decided to make them from scratch. I prefer them that way anyway.
Picture
I found a couple tempting recipes: Gina’s and Wilton. I decided to go with the Wilton recipe for a start. And man, what a result! It is simply delish! The cupcake (I have to admit, I am normally not a cupcake person) is light and fluffy with a fantastic banana taste. I had never used sour cream in a baking recipe but it is good!
Picture
Ingredients:
  • 2 ¼ cups all-purpose flour
  • 1 tsp baking soda
  • ¼ tsp salt
  • ¾ cup butter, softened
  • 1 ½ cups granulated sugar
  • 3 eggs
  • 1 ½ tsp vanilla extract
  • 2 ripe bananas, mashed
  • ¾ cup sour cream

Preparation:
  1. Preheat oven 350°F.
  2. In large bowl, cream butter and sugar with electric mixer until light and fluffy.
  3. In medium bowl, combine flour, baking soda, and salt; set aside.
  4. Add eggs, vanilla and banana; mix well.
  5. Add flour mixture alternately with sour cream; blend thoroughly but do not overmix.
  6. Pour into prepared pans. Bake 20-25 minutes or until toothpick inserted comes out clean.
  7. Cool 10 minutes in pan on rack; remove and cool completely before decorating.
Makes 18 cupcakes.
Picture

Read More
0 Comments

Maple Bread Pudding

11/11/2013

1 Comment

 
Picture
Once again, I had lots of leftover breads and cookies that had gone stale, so I decided to go ahead and make a bread pudding but I was not too happy with the one I had made last time, especially with the amount of liquid in it. So I looked around the internet and, although I didn’t find a recipe I wanted to use as is, I did find some ideas to try to create my own.
So, was I ready to throw myself into recipe creation? Well, even though the result is good, I’m not sure I’m ready for this kind of creativity yet. Although, as they say, “never say never”.

So, the result of this experiment was a bread pudding with a definite bread pudding texture. I really liked the texture. It makes it hard to evaluate the doneness of the cake, but it is smooth and nice in the mouth. I was not a fan of the crust, but it grows on you. I think what surprised me the most was the taste. As much as I love real maple syrup on my French toast, crepes or pancakes, I had never tasted a maple-flavored cake. So it took me a few bites to truly enjoy it. You really get that nutty smell and flavor. However, something was missing. We (my husband, a friend and I) finally came up with some ideas that would enhance the taste. I put these into the recipe below.

OH, and do not use a mold for angel food cakes for this. Bread pudding is a heavy cake, which makes it very hard, if not impossible, to remove from the mold without breaking the cake. I’m speaking from experience. Maybe a bundt cake mold would be better (I really need to get one) if you want a fancy shape, but a basic round cake mold is good. Anything that allows you to unmold by turning it over on cooling racks.
Picture
Picture
Ingredients:
  • 3 cups milk
  • 5 cups of bread crumbs
  • 100g butter
  • 1 cup dark brown sugar
  • 4 eggs
  • ¾ cup walnuts or dried cranberries
  • 70ml maple syrup

Preparation:
  1. Soak the bread in the milk for about 10 minutes.
  2. On medium heat, add the butter, sugar, maple syrup and walnuts to the bread.
  3. Stir until well blended.
  4. Off the heat, add the egg yolks, one at a time.
  5. Beat the egg whites with a pinch of salt to soft peaks.
  6. Fold the egg whites into the mixture.
  7. Bake at 400º for one hour.
  8. Let it cool. Serve with crème anglaise.
Picture
1 Comment

Quatre-Quart

11/9/2013

0 Comments

 
Picture
Have you ever noticed that when you become interested in something, it is all around you? I am now so obsessed with baking, it is sometimes scary. I often fall asleep thinking of recipes and wake up with more ideas. I’m actually pretty good at not purchasing more cookbooks but I do spend a lot of time on the internet looking at recipes and finding blogs I like.

This week, I discovered two new ones I’d like to share with you. One is Sweetopia.net. The woman who writes that blog does a lot of things but what impressed me the most was the beautiful work she does with cookie decorating. Some are so sophisticated! She has several tutorials and I cannot wait to try them out.

Another blog I discovered is called “Les mains dans la farine”, written by a Belgian woman living in the south of France. What I find interesting and can’t wait to try on her blog are some basic recipes. I’ve picked one of her recipes for a baking experience for this weekend (coming soon in another post).

A friend of mine recommended I watch the French TV show “Le meilleur patissier” (M6). It’s the French version (with variations) of the British show that inspired the American show “The American Baking Competition”. I have to say, I’m hooked! I can’t wait for the third episode to be posted online!

The first week’s theme was ”travel cakes”, a term used to refer to cakes that can be kept at room temperature for several days, making them ideal for traveling in times when refrigeration was non-existent. The general shape of such cakes is that of a “bread” as understood in American culture (as in banana bread, pumpkin bread...). The top must be crunchy while the inside must be fluffy and soft.
Picture
So yesterday, I decided to make my own version of the travel cake. Unfortunately, I cannot attest as to its freshness after a few days as, well, it’s already more than halfway gone, so I doubt it will last much longer. I used one of my tried and true recipes but did add some baking powder, just because I used a smaller and taller mold and I was afraid it would be too thick to rise. I also decided to make just the plain cake, not adding any other flavors but it is easy enough to do, as long as one knows you might have to adapt baking time.

The result was delicious! The top is delightfully crunchy while the middle melts in your mouth. Although it contains lots of sugar, the taste is not sickeningly sweet. This tastes delicious with coffee or hot chocolate. The color is a beautiful golden/light brown. This is a recipe that can easily be modified for large quantities.
Picture

Read More
0 Comments

Halloween treats

11/4/2013

0 Comments

 
Picture
This past weekend was a heavy baking weekend. After the waffles of Friday night, I made Halloween treats for a friend’s Halloween party on Saturday (and brioche bread on Sunday). It was a lot of fun and a challenge for me... although I did bite more than I could chew, leading me to use *blush* shortcuts... However, I still managed to learn something.


I started with Halloween cookies. I used the same recipe as for the French-themed cookies I had made, but had more fun with the decorating. It was far from perfect, mind you, and my hands and arms were killing me by the end BUT it was fun. I really like that cookie recipe but will try and find other types of cookies that can be decorated. I used Halloween-themed cookie-cutters and tried to ice designs on the cookies. There is still more to learn, obviously, but Christmas is almost here with plenty of excuses to make cookies.
Picture
Very cartoonish looking. The features on the ghosts and skulls were made with toothpicks, which does not allow for precise lines. The features of the devils were made using edible marker but the surface of the icing was a bit too bumpy.
For the other treats, I used shortcuts, I admit it. I used boxed mixes for the cakes and really worked on the icing technique. The mini-muffins were pumpkin spice muffins and I made them into brains, following inspirations found online. The cupcakes were chocolate and again, I found inspiration online for mummy cupcakes. All in all, I don’t think they were too bad. I definitely need to work with the consistency of the icing to make it easier to pipe.
Brain mini-muffins
Mummy cupcakes
Tomb brownies
So, for the last couple days, I’ve been looking up online tips to improve my cookie/cupcake decorating techniques and will, hopefully, soon be able to apply them.
Picture
0 Comments

Waffles

11/4/2013

0 Comments

 
Picture
On November 1st, All Saints’ Day, it has been a tradition in my family to get all together after going to the cemetery, to eat waffles. I still remember going to my Tante Yvonne (she actually was my great-aunt) and meeting aunts, uncles and cousins there for waffles.

Tante Yvonne was a petite but formidable woman, a force to be reckoned with. She had been a teacher for more than 40 years and knew everyone in the village she lived in... and everyone knew Mademoiselle Yvonne. She had a generous heart but was strict and demanding. I remember rules about not sitting on a specific sofa or following her directions when visiting my grand-father, her brother. But I also remember trips to the market, or learning to play solitaire with her. And then, there were the waffles. Mmmm, just like Proust’s madeleines, I remember the smell permeating the whole house, this yeasty smell, and the crunch of the waffles when they just come out of the waffle maker and putting powdered sugar on them...

Since my Tante Yvonne passed away, the tradition was taken over by my mother’s oldest sister, my Tante Yvette. The family with its extensions as our generation got engaged, married and had children, but it’s still going on. Every year, I receive notice or I hear about the get-together and the waffles.

My whole set up: wire racks, tools (like waffle fork, very necessary!), transformer for my waffle-maker from Belgium (14 years old and still amazing!).
Waffles coming out of the waffle-maker, nice and crispy (for a little while, they soften when cooling down).
Living so far away from home, I created my own tradition. My Tante Yvette shared the family recipe with me and every year, I make these waffles on November 1st. In the last few years, I have started inviting friends over to share. I set up in my garage, very informal, folding tables and chairs and paper products. I make the waffles right then and there and serve hot chocolate. We’ve had years where the weather was so nice, we had the garage door open and people going in and out. Other years, it was so cold, we needed a heater. I’ve had years with many guests and some years with not so many. There are some for whom it has become a real tradition to come over to my house for waffles. All in all, the tradition continues even with a different twist.
0 Comments

Upside-down Apple Cake

10/29/2013

0 Comments

 
I know, I said I was done with apples but I could not resist this one. I was looking through a notebook I have had since my teen years (and I won’t tell you how long ago that was). Apparently, I have always been fascinated with desserts because I have a full collection of recipes cut from various magazines. At the time, I was not concerned with where I found them, I therefore do not have a source to cite.
Picture
Ingredients:
  • 2-3 big apples
  • 150g flour
  • 4 eggs
  • 90g butter
  • 100g sugar
  • 50g powdered sugar

Preparation:
  1. Butter and flour a 9” cake pan.
  2. Peel the apples, slice them and put them in a circle in the pan. Have the apples overlap each other tightly.
  3. Preheat the oven at 350º.
  4. In a large bowl, beat 2 eggs and 2 yolks with the sugar.
  5. Beat the two remaining whites into firm peaks.
  6. Then add the melted butter, the flour and the two whites to the egg and sugar mixture.
  7. Pour the batter over the apples.
  8. Bake in the oven for 40 minutes.
  9. When done, let the cake cool down slightly before removing it from the pan.
  10. Sprinkle powdered sugar on it just before serving.
Picture
This cake is pretty easy to make, although slightly heavier than the one I made a couple weeks ago. One of my tasters mentioned she could taste the eggs but nobody else did. Maybe she was extremely sensitive to eggs. Let me know if you notice something similar. Anyway, I would not recommend having this cake as dessert after a good meal, it is too heavy. Instead, this is good for afternoon tea, coffee break... you know, indulgent moment.

You could easily replace the apples with pears, I can already taste it and it would be fantastic! If using canned half pears, remembers to put the curved half down onto the bottom so that it shows when turning your cake upside-down.


0 Comments

Brioche

10/22/2013

1 Comment

 
Picture
My challenge this week: to make brioche, you know, that sweet, light and fluffy bread one eats for breakfast. So I looked online for a recipe. Frankly, I should have looked first through my cookbooks because the plethora of recipes out there is overwhelming. But I picked one that said it was easy...


And I followed the recipe word for word, I did not get impatient, I did not skip any step. I was proud of myself. And yet, the result was so disappointing. Mind you, my daughter loved it, she kept eating it, she even took some of it to school today. My husband loved it too, he even compared it to something his mom makes, and he has only the highest compliments for his mom’s cooking.

But I didn’t like it. I didn’t like the taste, the look or the texture of it. The dough looked weird and never rose. The bread itself was dense and looked more like a cake than bread.

Picture
Picture
So I decided to make another one. I looked at other recipes to see if they were doing this differently. I looked through a book I have on breads and one thing struck me. It mentioned that for brioche, you could just mix all ingredients, like the recipe I used mentioned, HOWEVER, the dough then needed to rise for 12 hours!!!!! 12 Hours!!!! The recipe mentioned 2 hours! And I believe that this was the problem.

Thus, I mix the ingredients, same ingredients, in a different way. And I have to say, the result is spectacular. The dough did rise, the bread looks like a bread and tastes fantastic too. Now, remember, I used the same recipe as the day before (except the butter was softened instead of melted). I just changed the way I mixed the ingredients and I got a totally different result.
Picture
Picture
Here is my modified recipe.

Read More
1 Comment

Apple-Cinnamon Coffee Cake

10/20/2013

0 Comments

 
I'm sure you're getting tired of apple recipes. So am I but I still have apples to use up. However, I promise to try something new next, not apple-related, and keep my other apple trials for later on... PROMISE!!!
For this recipe (found in the "Great American Home Baking" recipe collection), I used an apple that is sweeter than the Wingate but a bit more tart than Golden Delicious. It is an apple that tastes good eaten, baked or in a sauce. The name I had was "Samoa" but I can't find it in the apple directory, unfortunately...
Picture
This cake is light and fluffy and delicious, without being too sweet. The apple taste is subtle and I could probably have put more of them. One thing I noticed was that the apples sank to the bottom of the cake, not the complete bottom, mind you, but enough to not have a clearly-defined layer of cake underneath the layer of apples. Now, the only way I did not follow the directions was that I didn't wait for the apples to be completely cooled and they were probably not drained properly. Would that lead to them sinking? Other than that, the cake rose fantastically. It's always iffy when using fruit as it can make the batter heavier and prevent it from rising. But I am really happy with the results here. A light cake, but still moist.
Picture

Recipe


Read More
0 Comments
<<Previous
Forward>>

    Enter your email address:

    Delivered by FeedBurner

    RSS Feed

    Table of Content

    Articles listed by date (available soon)

    Archives

    October 2014
    March 2014
    February 2014
    January 2014
    December 2013
    November 2013
    October 2013
    September 2013
    August 2013
    July 2013
    June 2013

    Categories

    All
    Almond Cream
    Apples
    Apple Sauce
    Banana
    Basic Cake
    Bread
    Brownies
    Cake
    Cannoli
    Caramel
    Chocolate
    Cinnamon
    Coconut
    Cookies
    Crepes
    Cupcakes
    Filling
    Frosting
    Fruit
    Icing
    Louisiana
    Madeleine
    Mardi Gras
    Meringue
    Mousse
    Muffins
    Orange
    Pastry Cream
    Pie
    Pop
    Pudding
    Puff Pastry
    Puff Pastry
    Savory
    Shortbread
    Specialty Bread
    Strawberry
    Sugar
    Tartlet
    Vanilla Cream
    Waffles
    Whip Cream
    Zucchini

    Author

    My name is Anne-Sophie and I've always enjoyed baking. I've decided to try and spend more time trying new recipes and would like to share the journey. I am particularly (but not exclusively) interested in French/Belgian recipes.


Powered by Create your own unique website with customizable templates.