Baking Experiences
  • Home
  • Gallery
  • Contact me

Eclairs

2/6/2014

1 Comment

 
Picture
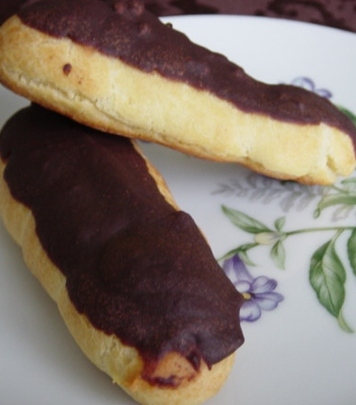
Last weekend's project was "eclairs". I needed to revisit the dough I used for the cream puffs AND the recipe for the vanilla cream used to stuff them.
I remembered some lessons, forgot others and will need to do this again to keep improving. Not that I seem to run out of people willing to try the desserts...
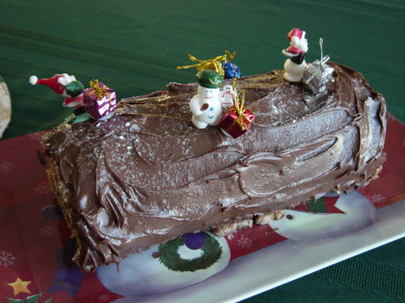
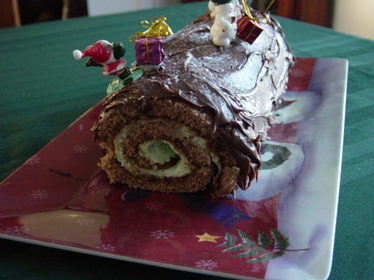
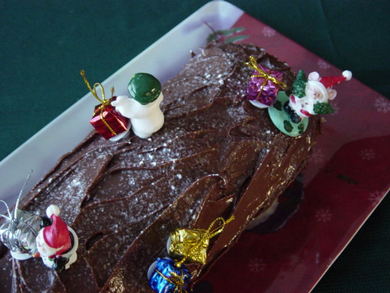
All in all, this week's experiments tasted really good, I just need to work more on the appearance side of things. I would say that my major fault here is my impatience. I just want to go too fast. What is frustrating is that I KNOW I am going too fast as I do it but I can't seem to slow myself down. This was particularly the case with the chocolate ganache in this case.

The eclairs recipe

For the eclairs, I used this recipe, it is a basic recipe, pretty easy to accomplish. That was not the issue. However, I'm always amazed at how hard it is to deal with oven temperatures and length of baking. See, this recipe is used to make little cream puffs, eclairs and many more other items. Everything is different, different sizes, different thickness, so the temperature and length of baking will be different for each one.
Now, as you are baking, it is not so hard to say "ok, a couple minutes more". What is hard though is to keep track of how you modify the time for the next time you want to do this. And I haven't even figured out how to play with the temperature. How do you know which temperature would be the best for your project?
Picture
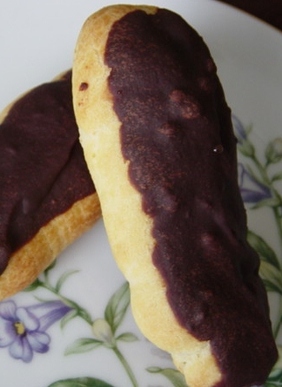
One of the lessons I had learnt from making the cream puffs was that the size of the batter you put on the sheet does not change much when baking, it doesn't rise and double volume or anything close to that. So I made sure my eclairs were close to the size I wanted in my final product.

However, in my first batch, I poured the batter in a kind of rope and did a "folded" rope to ensure enough width. Well, the result was disappointing. The rope was not thick enough or high enough, which means those eclairs were flat. And the two parts of the rope did not mesh completely during baking, which gave me eclairs with a weird valley in the middle. This batch tasted good but looked horrible.

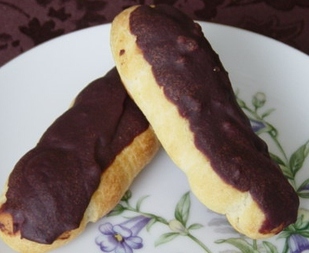
So for the second batch, I kept the pastry bag closer to the baking sheet and made sure to pour more batter. Frankly, I could have gone even further. I should have ended up with a sausage-like batter about one inch thick. The other thing is how hard it is to keep that pastry bag steady and pour the batter in a uniform way. I ended up with some funky shaped eclairs.

All in all, taste-wise, this was a success. Look-wise, well, there is still work to be done...
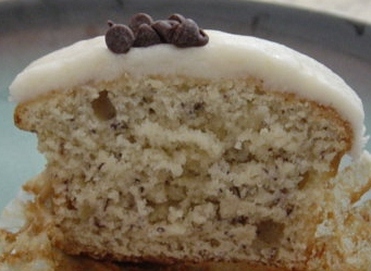
The cream

Picture
For the cream, I used the same recipe I used when I made the King Cake. The only mistake I made was once again due to my impatience. Small detail but it shows how important it is. I used the wrong measuring spoon to measure the vanilla extract and poured a bit too much of it.
The cream tasted good otherwise, however, I think I'm looking for something that has more firmness to it, more thickness.
Stuffing the eclairs was not easy, even if I used the smallest tip I had. I'm going to look into long and thing injectors or something like that. It is also really hard to know when to stop filling... because when it starts oozing out of the eclairs, it's too late...

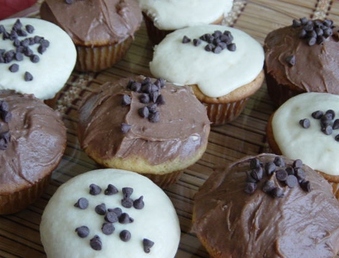
The chocolate ganache

Picture
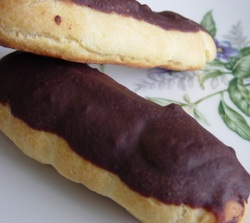
Technically, this was the easiest part, just melt chocolate and mix with some heavy cream. Once again, my impatience got the best of me and my chocolate was grainy and my ganache a bit too thick.

Now, I know why I was so impatient that day, it was the traditional day for crepes and I had guests over for crepes. Why did I start another project on the same day? Who knows but definitely not something to repeat. *embarrassed*


In the end, I'm glad to say I made eclairs. The taste was really good, so I know the recipes work, I just need to work on technique and appearance. and  PATIENCE!!!

There is hope!

What is your weakness when baking?
1 Comment

Chocolate-orange fondant

1/19/2014

0 Comments

 
Picture
This week's experiment was a last minute decision. A friend of mine mentioned making this cake for her husband this week and it sounded so good, I just had to try it.

It was quick and easy to make and, fortunately, I had all the ingredients at home.
.. well, almost, I didn't have 200g of 70% cocoa chocolate. I had one 60% bar (113g) and also used semi-sweet baking chocolate.

The result: first, you gotta love dark chocolate. The taste is powerful and, if you don't like dark chocolate, well, you won't like this. You can really feel it on the back of your tongue. The orange taste was also pretty strong (although my daughter says she couldn't taste it) but a good complement to the dark chocolate.

I do not like when recipes are not precise. In this case, the size of the pan was vague ("a large pan"). How big is a large pan? And is a large pan in France the equivalent of a small or medium pan in the US (you know, like fast-food portions)? So, I used a 10" pan...
Now, I knew from the comments on the recipe not to expect a high cake. However, this was really thin, as in between 1/2" and 3/4" thick. I understand that this was not a regular cake, there is no flour, but was the thickness due to the large pan or really all I could expect? If I used a smaller pan, would it make the cake higher or just prevent it from cooking thoroughly in the allocated time.
Picture
The texture of the cake was fantastic. It is very much like a mousse, light and fluffy. But, careful, the richness of the cake makes me wonder if having a thicker cake would really be a good idea or just become too overwhelming. I would suggest serving this maybe with a scoop of French vanilla ice cream, or at least whip cream.
Picture
Original recipe here.
Ingredients:
  • 200g dark chocolate (70%)
  • 1 orange (pick organic, since using the zest).
  • 5 eggs, separated
  • 50g butter
  • 10g cornstarch
  • 30g powdered sugar
  • 2 pinches of cinnamon

Preparation:
  1. Wash the orange thoroughly, zest it with a grater, squeeze the juice and keep everything aside.
  2. Break the chocolate in small pieces and melt it in a double-boiler (bain-marie).
  3. Melt the butter in the orange juice.
  4. In a large bowl, mix the sugar, cinnamon and cornstarch. Then add the egg yolks one at a time.
  5. Add the orange zest, then the chocolate, then the melted butter/orange juice.
  6. Beat the whites with a pinch of salt. Incorporate them little by little into the chocolate batter.
  7. Pour the batter in a buttered/floured large pan (see note above).
  8. Bake it for 20-25 minutes at 350 degrees.
  9. Let it cool before removing it from the pan.
  10. Decorate using powdered sugar, candied orange peels, grated chocolate...
Picture
Notes:
  • The surface of the cake was beautiful! I went for the quick and easy powdered sugar to decorate, but really, it was a shame to hide the beautiful surface.
  • I've mentioned the taste was very strong and not very sweet at all. If you prefer sweeter, try and modify the recipe to add more sugar OR


  • Try the recipe with milk chocolate (omit the orange zest and replace the orange juice with milk and cocoa powder). I don't know what the result would be but since there is more sugar in milk chocolate...

Let me know what you think... Does it look appetizing? Would you want to try it? Have you made something similar? Have you experimented with different pan sizes? What were the results?
0 Comments

Traditional Yule Log cake

12/28/2013

1 Comment

 
PictureBûche de Noël
'tis the season and with it, its delicious indulgences. One cannot help but look forward to this time of year and its traditions, especially the culinary ones, from bread, to cakes, pies or cookies.

Now, I'm not one of those who go crazy baking cookies... my last post about it was my latest attempt.
I like them, don't get me wrong, but I'm not into making dozens after dozens and giving them away to everyone and all that... Instead, I have my favorites, memories of my childhood, that I am now sharing with my daughter. She now looks forward to these traditions, even though she's not yet interested in learning how to make them.

The Yule Log cake is a French/Belgian tradition. It is a cake shaped like a log, to refer to the tradition of burning a huge log for the 12 days of the Christmas season (then called Yule). This was supposed to bring good luck for the year. A mix of pre-Christian and Christian traditions here, as is often the case.
Picture
If you go to a pastry shop in France or in Belgium, just before Christmas, you will have so many choices in yule log cakes, going from extremely traditional to avant-garde modern, to ice-cream cakes. Needless to say, it might be a traditional cake, but you will rarely experience twice the same one.
Picture
So, a few years ago, I started making my own yule log cake, which is a rolled cake with a filling and frosting made to look like a log. I've never made twice the same cake so far and some have been better than others, but they've all come out pretty good. This year's cake was particularly successful!

My daughter chose the flavors: chocolate and mint! So, off I went to the great internet to find recipes. I found a recipe for a mint and chocolate cake but didn't like the filling cream, so I just used their cake and syrup recipes. I made up my own recipe for the filling and the frosting (nothing fancy or too precise either).

Read More
1 Comment

Banana Cupcakes

11/14/2013

0 Comments

 
Picture
This week’s project: cupcakes and frosting. I just love bananas and had to find a recipe for a banana cupcakes (so I’d have the excuse of practicing frosting). I mean, I could have gone for any type of cupcakes, I could even have picked a box, just to have a canvas to practice frosting, but I decided to make them from scratch. I prefer them that way anyway.
Picture
I found a couple tempting recipes: Gina’s and Wilton. I decided to go with the Wilton recipe for a start. And man, what a result! It is simply delish! The cupcake (I have to admit, I am normally not a cupcake person) is light and fluffy with a fantastic banana taste. I had never used sour cream in a baking recipe but it is good!
Picture
Ingredients:
  • 2 ¼ cups all-purpose flour
  • 1 tsp baking soda
  • ¼ tsp salt
  • ¾ cup butter, softened
  • 1 ½ cups granulated sugar
  • 3 eggs
  • 1 ½ tsp vanilla extract
  • 2 ripe bananas, mashed
  • ¾ cup sour cream

Preparation:
  1. Preheat oven 350°F.
  2. In large bowl, cream butter and sugar with electric mixer until light and fluffy.
  3. In medium bowl, combine flour, baking soda, and salt; set aside.
  4. Add eggs, vanilla and banana; mix well.
  5. Add flour mixture alternately with sour cream; blend thoroughly but do not overmix.
  6. Pour into prepared pans. Bake 20-25 minutes or until toothpick inserted comes out clean.
  7. Cool 10 minutes in pan on rack; remove and cool completely before decorating.
Makes 18 cupcakes.
Picture

Read More
0 Comments

    Enter your email address:

    Delivered by FeedBurner

    RSS Feed

    Table of Content

    Articles listed by date (available soon)

    Archives

    October 2014
    March 2014
    February 2014
    January 2014
    December 2013
    November 2013
    October 2013
    September 2013
    August 2013
    July 2013
    June 2013

    Categories

    All
    Almond Cream
    Apples
    Apple Sauce
    Banana
    Basic Cake
    Bread
    Brownies
    Cake
    Cannoli
    Caramel
    Chocolate
    Cinnamon
    Coconut
    Cookies
    Crepes
    Cupcakes
    Filling
    Frosting
    Fruit
    Icing
    Louisiana
    Madeleine
    Mardi Gras
    Meringue
    Mousse
    Muffins
    Orange
    Pastry Cream
    Pie
    Pop
    Pudding
    Puff Pastry
    Puff Pastry
    Savory
    Shortbread
    Specialty Bread
    Strawberry
    Sugar
    Tartlet
    Vanilla Cream
    Waffles
    Whip Cream
    Zucchini

    Author

    My name is Anne-Sophie and I've always enjoyed baking. I've decided to try and spend more time trying new recipes and would like to share the journey. I am particularly (but not exclusively) interested in French/Belgian recipes.


Powered by Create your own unique website with customizable templates.