 Bûche de Noël
 'tis the season and with it, its delicious indulgences. One cannot help but look forward to this time of year and its traditions, especially the culinary ones, from bread, to cakes, pies or cookies.
Now, I'm not one of those who go crazy baking cookies... my last post about it was my latest attempt. I like them, don't get me wrong, but I'm not into making dozens after dozens and giving them away to everyone and all that... Instead, I have my favorites, memories of my childhood, that I am now sharing with my daughter. She now looks forward to these traditions, even though she's not yet interested in learning how to make them.
Now, I'm not one of those who go crazy baking cookies... my last post about it was my latest attempt. I like them, don't get me wrong, but I'm not into making dozens after dozens and giving them away to everyone and all that... Instead, I have my favorites, memories of my childhood, that I am now sharing with my daughter. She now looks forward to these traditions, even though she's not yet interested in learning how to make them.
The Yule Log cake is a French/Belgian tradition. It is a cake shaped like a log, to refer to the tradition of burning a huge log for the 12 days of the Christmas season (then called Yule). This was supposed to bring good luck for the year. A mix of pre-Christian and Christian traditions here, as is often the case.
If you go to a pastry shop in France or in Belgium, just before Christmas, you will have so many choices in yule log cakes, going from extremely traditional to avant-garde modern, to ice-cream cakes. Needless to say, it might be a traditional cake, but you will rarely experience twice the same one.
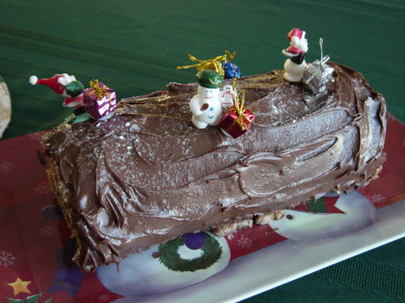
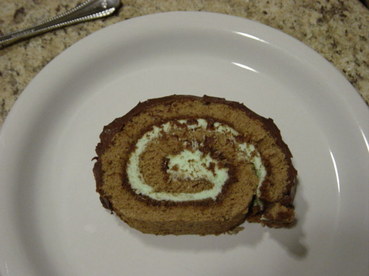
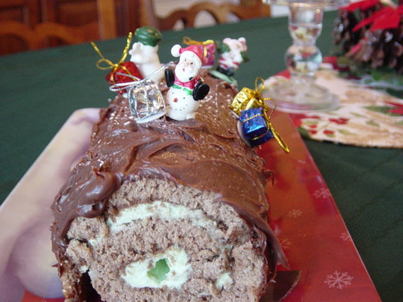
So, a few years ago, I started making my own yule log cake, which is a rolled cake with a filling and frosting made to look like a log. I've never made twice the same cake so far and some have been better than others, but they've all come out pretty good. This year's cake was particularly successful!
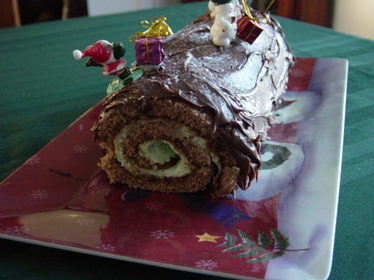
My daughter chose the flavors: chocolate and mint! So, off I went to the great internet to find recipes. I found a recipe for a mint and chocolate cake but didn't like the filling cream, so I just used their cake and syrup recipes. I made up my own recipe for the filling and the frosting (nothing fancy or too precise either).
My daughter chose the flavors: chocolate and mint! So, off I went to the great internet to find recipes. I found a recipe for a mint and chocolate cake but didn't like the filling cream, so I just used their cake and syrup recipes. I made up my own recipe for the filling and the frosting (nothing fancy or too precise either).
The cake
(Original recipe)
Ingredients:
For the cake:
Ingredients:
For the cake:
- 4 eggs
- 125g sugar
- 25g cocoa powder
- 110g flour
- 200g sugar
- 200 ml water
- 2 tbsp cocoa powder
Preparation:
- Mix the eggs and sugar in a pan. Heat on medium heat and whip this mix (with a whisk) until it reaches 50 degrees Celsius (122 degrees F).
- Remove from heat and pour into a large bowl. Beat with an electric mixer until completely cool. The mix becomes whitish and holds (is firmer).
- Add the combined and sifted flour and cocoa powder in 2-3 times, mixing delicately with a wooden spoon to avoid having your batter fall back.
- Spread your batter on a baking sheet ( I used the medium size in the 3-sizes sets commonly found ) covered with parchment paper. Try and spread it down to 3/4" thickness. Don't worry if the whole surface is not covered, but you want to cover as much as possible. Also don't worry about the edges, as they will be cut.
- Heat at 350 degrees for 8-10 minutes. The cake will still look a bit wet, but it's not. I tested with my finger, it left an indentation.
- When you take your cake out of the oven, slide it on a damp towel. Roll your cake, cover with the damp towel and let it cool down. Note: I had the parchment paper on the bottom of the cake, followed the original recipe and covered the top of the cake with the damp towel. When I rolled the cake, it was touching the towel and that removed a layer of the cake when I unrolled. I'd recommend to either cover the top of the cake with another piece of parchment paper before putting the towel OR to roll the cake then wrap it in the damp towel to let it cool.
The filling and the frosting
Ingredients:
For the filling:
For the filling:
- 125g mascarpone
- ¼ cup heavy whipping cream
- 1 tsp mint extract or other flavoring
- 3 tbsp sugar
- Food coloring as preferred
- 150g semi-sweet chocolate
- 200 ml heavy cream
Preparation of the filling:
Note 2: Please adapt the quantities to your preferences, start small and add as needed. I used a whole container of mascarpone and had way too much leftover. Start with mixing the mascarpone and cream, then add flavoring, then color.
- Beat the mascarpone until you get a smooth/creamy consistency.
- Add the whipping cream to facilitate and make it a bit more liquid (just to make it easier to spread). Add more whipping cream if necessary.
- Add the flavoring and sugar to taste.
- Beat until creamy. The consistency will not be as smooth as before but better.
- Cover with plastic wrap and keep refrigerated until ready to use.
Note 2: Please adapt the quantities to your preferences, start small and add as needed. I used a whole container of mascarpone and had way too much leftover. Start with mixing the mascarpone and cream, then add flavoring, then color.

Preparation of the frosting:
- Heat a third of the cream in a small pan, until warm (not hot/boiling, but more than lukewarm).
- Put the chocolate in a mixing bowl, cut in pieces.
- Pour the warm cream onto the chocolate and start mixing until smooth and shiny.
- Add the remainder of the cream and mix until smooth and shiny.
- Store in the fridge until firmer.
Putting it all together
- Unroll your cooled cake, slowly and carefully.
- Spread your filling in a 1/2" layer.
- Roll your cake again.
- Cut the edges of the roll so it looks good.
- You can use the extra pieces to get fancy on your decorating or to just get a sneak taste of your finished cake.
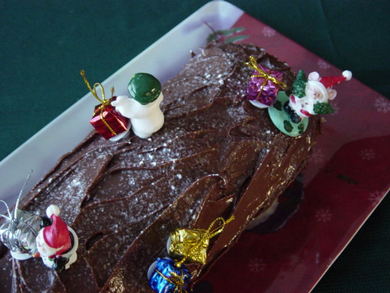
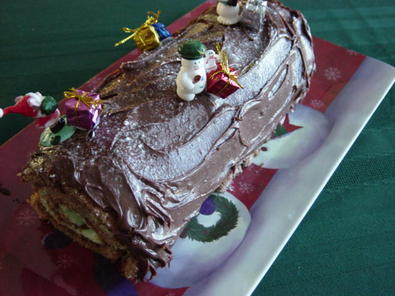
- Take your frosting and spread on the cake. You can go very smooth, or if you prefer traditional, make it look like a log. Here I just used a small spatula to spread the frosting and got a good effect. You can also use a fork to draw the bark.
- Decorate with plastic decorations, marzipan or sugar items or simply powdered sugar.
 RSS Feed