
This week’s challenge: making a few dozen cookies on a French theme for a local event. I wanted to work with a French recipe, easy to make, but challenging me, of course.
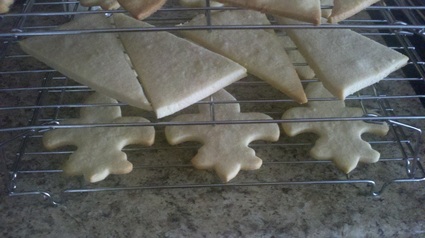
So I chose “sablés”, which are dry cookies (sable = sand) that can be shaped by hand, with a knife or with a cookie cutter. The recipe is fairly simple and does allow for slight variations of taste (adding lemon juice, lemon zest, orange juice). The beauty of these cookies is that you can use your imagination in the decorating.
So I chose “sablés”, which are dry cookies (sable = sand) that can be shaped by hand, with a knife or with a cookie cutter. The recipe is fairly simple and does allow for slight variations of taste (adding lemon juice, lemon zest, orange juice). The beauty of these cookies is that you can use your imagination in the decorating.
Recipe for the cookies
Ingredients:
- 1 egg
- 120g of sugar
- 1 packet of vanilla sugar or 1 tsp of vanilla extract
- 250g of flour
- 125g of softened butter
Preparation:
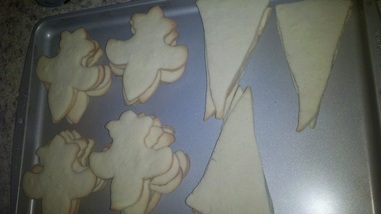
By tripling the recipe, I got around 46 cookies (2 different shapes), counting the ones that were not fit for company. I ended up with 42 "useable" ones. Note that my cookies are fairly big (5" tall and 3" wide at their largest).
- Mix in a large bowl: the egg, a pinch of salt, the sugar and the vanilla. Mix with a wooden spoon until pale and creamy.
- Add the flour then mix with your fingers until it looks/feels like sand.
- Add the butter and mix until you get a dough.
- Hit the dough by throwing it from hand to hand until you get an homogenous ball. If the dough is too fat or soft, add a bit of flour.
- Wrap the dough in saran wrap and let it rest in the fridge for 30 minutes.
- Put some flour on a flat surface and on your rolling pin, then spread the dough until ¼” thick.
- Cut your cookies, using a knife, cookie cutter or glass.
- Put the cookies on a cookie sheet covered with parchment paper.
- Bake in a 350 degree oven for 12-15 minutes (until the edges start to VERY SLIGHTLY brown.
By tripling the recipe, I got around 46 cookies (2 different shapes), counting the ones that were not fit for company. I ended up with 42 "useable" ones. Note that my cookies are fairly big (5" tall and 3" wide at their largest).
Tips
- I noticed the dough I used last (longest in the fridge) was easier to work with, the edges were firmer and did not roll when I picked up the cookies.
- Divide the dough in smaller portions to put in the fridge, so you work only with part of the dough at a time, especially useful if you double/triple the recipe (I tripled it for this event).
- I tried using all of the dough, so I reshaped the leftover into a ball, let it rest in the fridge and kept cutting cookies. However, at the end, my cookies were closer to 1/8” thick and they didn’t come out too good. But I kept and used them for practice with the icing. Very useful!!
- I’ve mentioned, when talking about the patriotic sugar cookies, that I always had trouble taking them out of the oven on time. These cookies present the same challenge... although I did much better this time! The original recipe I used called for 20 minutes in the oven. I started checking at 10 minutes. Some batches needed 12, some needed 15. Keep an eye on them. But the idea is the same, they are very pale cookies.
Decorating Time!!!!
For the icing, I made “Royal icing”, which is an icing that hardens and therefore allows cookies to be stored together and last. The recipe is easy but time consuming to make.
There are three ingredients in the royal icing:
There are three ingredients in the royal icing:
- powdered sugar,
- lemon juice and
- egg white.
- Start with the sugar and sift it (that is what takes so long).
- Then, add the egg white and the lemon juice and mix until you get the icing.
- If it is too liquid, add sugar (sift it!). If it’s too dry add a couple drops of lemon juice or water.
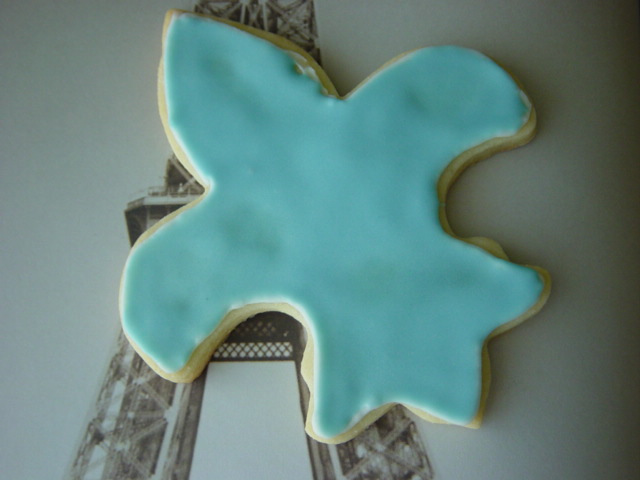
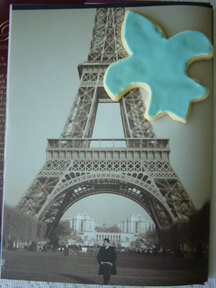
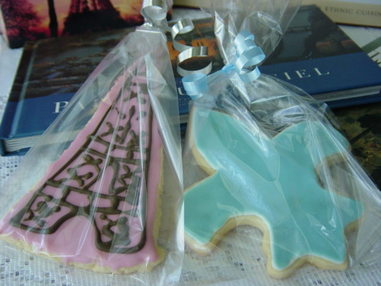
For the fleur-de-lys, I started by tracing a border with white icing. I then filled it up with blue icing (7 drop of food coloring).
| 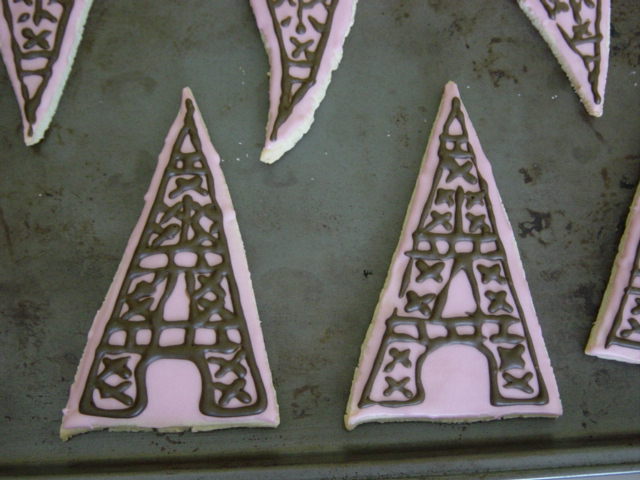
For the Eiffel towers, not having a cookie cutter, I cut triangles and drew the Eiffel towers with icing. I started by covering the cookies with a pink icing (5 drops of red and 1 drop of blue). Then made black icing (well actually, very dark brown icing, I ran out of food coloring after 40 drops each of red, blue and yellow). I drew the Eiffel towers free hand, so not perfect but I'm pretty happy with the results.
|
- Note that I find it very hard to evaluate how much icing one ends up with with a specific amount of sugar.
- Since you cannot really use less than one egg to make smaller quantities, I think next time I'll buy egg whites. This will also allow me to avoid throwing away a whole bunch of yolks (although I did look up and found a couple of websites giving recipes using up to 12 yolks).
- To cover a surface, you want to have a more liquid version of icing, I’d say like heavy yogurt maybe.
- To create borders, you want something firmer (as in, draw a line through your bowl and see that it takes 10-15 seconds for the icing to erase the line).
- To write or draw, you want something in between, firm so it doesn’t spread but liquid enough to allow you to squeeze the bag without straining your hand (can you tell I’m speaking from experience?)
Anecdote: I tried to go the easy way and went to purchase a tube of icing I could use to draw my Eiffel towers (my hand hurt so much from making the borders on the other cookies). Unfortunately, after buying Wilton's sparkling gel and trying it on one of my extra cookies, it didn't seem to dry out. I checked online and found out it takes 3-4 days to dry!!!! So, I went back to making my own icing. I made it a bit more liquid than before and it worked great!
| 
|
 RSS Feed