Challenge this week: still work on pie crusts and expand. I decided to go for a traditional Belgian pie crust, and practice the "crème pâtissière", this vanilla cream one finds in pies and éclairs. I also took the opportunity to practice more on my piping with a homemade whip cream.
Flemish Yeast Dough pie crust
This traditional pie crust is yeast-based, which has a very different texture from a traditional pâte brisée. It needs to rise and is therefore more time-consuming (but not labor-instensive) than a regular pie crust. However, the results are delicious. I found this recipe in this FANTASTIC book, my go-to book for anything that has to do with my culinary heritage.
Ingredients
Additional notes:
Ingredients
- 1/2 ounce fresh cake yeast or 1 package active dry yeast
- 1/4 cup milk, warmed to 100 F
- 1-1/2 cups all-purpose flour, plus an additional 1/2 cup if needed
- 1/4 cup sugar
- pinch of salt
- 1 large egg, lightly beaten
- 2-1/2 tablespoons unsalted butter, melted
- Sprinkle the yeast over the milk in a small bowl. Let it sit until foamy, about 5 minutes. Stir well.
- Sift the flour into a large mixing bowl. Add the sugar and salt and combine the dry ingredients with a whisk. Make a well in the center. Pour in the egg, yeast mixture, and butter.
- Use your fingertips to gradually work the flour into the liquid ingredients until you have a smooth, soft dough that holds together. Add just enough flour to make a dough that does not stick to your fingers and can be rolled out easily. Do not knead or over work this dough or it will become tough.
- Form the dough into a ball and place it in a large, lightly oiled bowl. Cover with a kitchen towel or plastic wrap and let rise in a warm spot until doubled in volume, about 1 hour.
- Generously butter and flour one 12-inch or two 8-inch tart pans.
- Punch down the dough and remove to a lightly floured surface. Roll the dough into a round, about 1/4-inch thick. For a thinner crust, divide the dough in half and roll out into 2 rounds, 1/8-inch thick.
- Drape the dough over your rolling pin and transfer to the prepared tart pan. Fit the dough into the pan; trim and crimp the edges. Prick holes on the bottom of the tart with a fork. Cover with a kitchen towel and let the dough rise again for 20 to 30 minutes before filling and baking.
Additional notes:
- I added a little bit of cinnamon in the dry ingredients. Not enough to make it pop but enough to give a hint as you bite into the pie.
- Even though the recipe says you can do two 8" pies with this dough, it is VERY tight. You need to roll the dough to very thin and you have to be good at rolling your dough so that it stays a circle. Just so you know...
- However, even at its thinnest, the dough did not break when I rolled it onto my rolling pin to transfer into the pie pan. Believe me, I stressed but it held beautifully.
- I baked the pie crust on its own, before filling. I put it at 350 degrees (180 Celsius) for 13 minutes and it came out really nice. It was a guess as all the recipes mentioned baking AFTER filling. I did not brush anything on the dough and I like the color but you could easily brush it with an egg wash or milk wash before baking.
Creme patissiere
This type of cream filling is very common in French/Belgian pastries but there are so many recipes, it is quite confusing. I searched online, narrowed my options to a few recipes and picked one to start.
Ingredients
Ingredients
- 2 cups of milk
- 125 g of sugar
- 50 g of flour
- 2 eggs
- 1 tsp of vanilla extract or other flavoring
- Heat the milk with half of the sugar, stirring constantly to avoid burning the bottom of the pan. Add the vanilla extract.
- In a large bowl, mix the rest of the sugar with the flour. Add the eggs and beat vigorously until the mix whitens. Add the warm milk little by little while mixing.
- Pour the mix back into the pan and bring to a boil. Stir constantly with a wooden spoon to thicken the cream.
- Pour in a shallow pan (to reduce the thickness and speed the cooling down process), cover with saran wrap to prevent the forming of a skin or crust. Let it cool down before putting in the fridge.
- For a stronger vanilla flavor, you could use a vanilla bean in the heating milk. It was a bit above my budget, so I'm sticking with vanilla extract. Also, I have to admit I didn't measure the vanilla extract. I just poured some in there...
- Taste-wise, the cream was delicious! HOWEVER, DO NOT use it for cream pies. Instead, use this recipe to fill eclairs, cream puffs, etc. This cream does not firm up enough to be used in a pie/tart. When you cut it, it just slides (hence no pictures of the inside of the challenge this week).
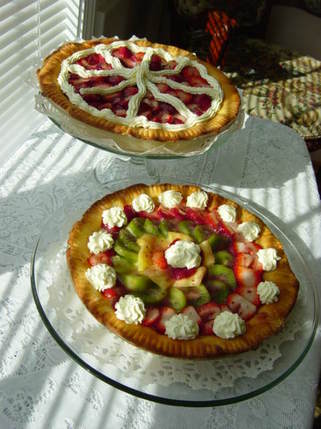
Finishing touches
The fruit:
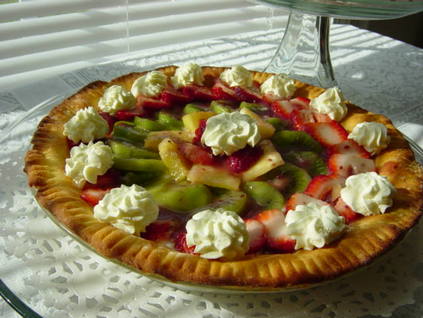
I used colorful fruits. For future project, I'd go with small strawberries that just need to be cut in half. The size of the strawberries required me to slice them and the inside is just not as attractive color-wise. I still need to practice the placement of the fruit to make it as attractive as possible, especially when combining various fruits. Taste was fantastic though.
The glaze:
I made a simple glaze with sugar, water, raspberry preserves and a bit of cornstarch. Ideally, you want to use jelly (like currant jelly) to have a more discreet color (to avoid hiding the fruit's color) as well as no seed or fruit pieces. I just used what I had on hand.
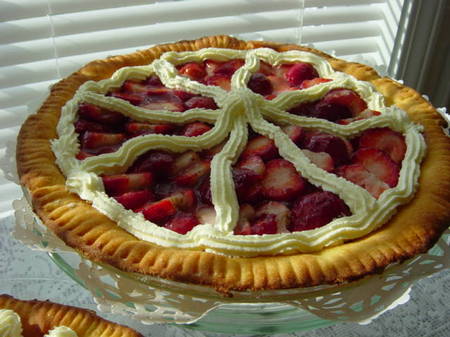
The whip cream:
Heavy whipping cream with powdered sugar and a spoonful of vanilla pudding (a trick I found online to stabilize your whip cream). I need to remember to sift the powdered sugar and pudding mix. I'm sure the texture would look a little different. However, the whip cream did taste really good. You can see on the pictures I still need to work on the piping techniques but it was only last week that I tried piping for the first time, so I'm glad of the results.
I used colorful fruits. For future project, I'd go with small strawberries that just need to be cut in half. The size of the strawberries required me to slice them and the inside is just not as attractive color-wise. I still need to practice the placement of the fruit to make it as attractive as possible, especially when combining various fruits. Taste was fantastic though.
The glaze:
I made a simple glaze with sugar, water, raspberry preserves and a bit of cornstarch. Ideally, you want to use jelly (like currant jelly) to have a more discreet color (to avoid hiding the fruit's color) as well as no seed or fruit pieces. I just used what I had on hand.
The whip cream:
Heavy whipping cream with powdered sugar and a spoonful of vanilla pudding (a trick I found online to stabilize your whip cream). I need to remember to sift the powdered sugar and pudding mix. I'm sure the texture would look a little different. However, the whip cream did taste really good. You can see on the pictures I still need to work on the piping techniques but it was only last week that I tried piping for the first time, so I'm glad of the results.
Final thought
The combination of the dough, the cream, the fruit and the whip cream was really well balanced. None of the elements overwhelmed the others. The dough held well and handled the wetter elements beautifully. So once I find a cream that can firm up, this will be a fantastic recipe to keep.
 RSS Feed