Baking Experiences
  • Home
  • Gallery
  • Contact me

Banana cupcakes - revisited

1/24/2014

3 Comments

 
Picture
I had quite a few bananas that were on their sad darkening way and needed to use them to avoid wasting. I remembered having absolutely loved the banana cupcakes and having had issues with the icing (mainly it was too sweet).

So, I made the cupcakes again, not changing anything in the recipe but looked for a different icing.

Frankly, my idea was to make a simple chocolate whipped cream topping, that I have done before. The purpose here was not to experiment but to avoid wasting bananas. But my daughter just begged for a banana icing again. So off I went on the look out for a banana whip cream.

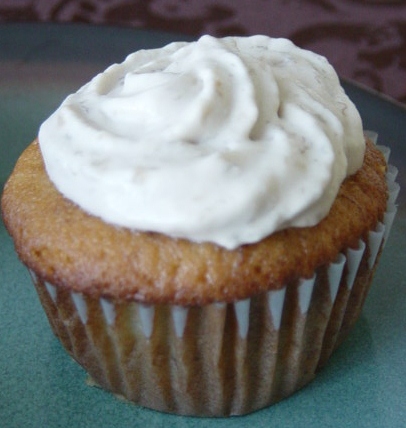
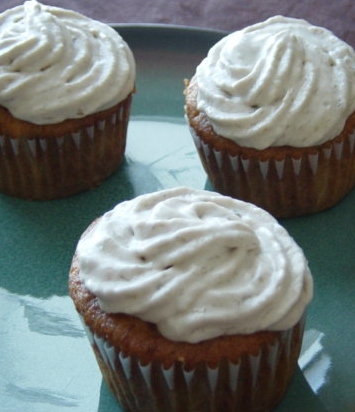
And, man, there are a lot of recipes out there, some simple, some not so much. I decided to improvise, based on what I had on hand.

I mashed two bananas and mixed them with 250ml (1 cup) of heavy whipping cream. I added some lemon juice and a bit of powdered sugar (to taste). I used beaters and made it as fluffy as it would go.
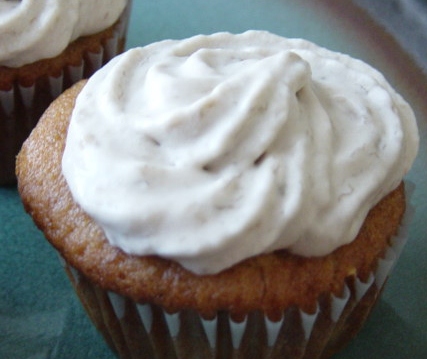
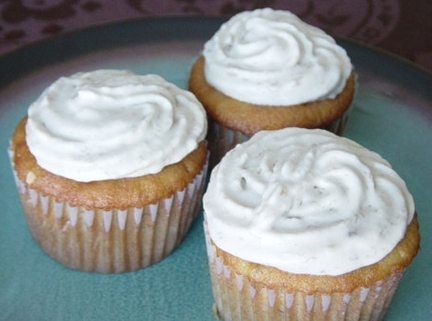
Picture
The results:
TASTE -- Fantastic! Light, slightly sweet, with a good banana flavor.
TEXTURE -- smooth and nice in the mouth.
APPEARANCE -- not a problem here and for me but be aware that it does brown a little, to a light beige color.

Issues:
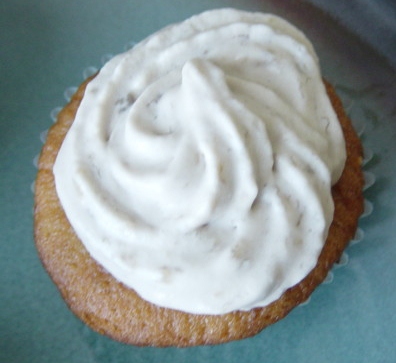
  • I don't know if the banana is too heavy, if the proportions were off, if I didn't beat the mixture enough or if something was missing, but although I was able to pipe the topping onto the cupcakes, it was still a bit too runny to stay nice and firm. I usually put some vanilla pudding powder in my whip cream and maybe I should have done that, I don't know.
  • One of the recipes was calling for the lemon juice to be poured over the bananas before smashing them. Others were adding it afterwards. I think I will try and use it to prevent the browning of the fruit next time.

Decoration:
Use chopped nuts, chocolate chips, chocolate shavings...
3 Comments

Chocolate-orange fondant

1/19/2014

0 Comments

 
Picture
This week's experiment was a last minute decision. A friend of mine mentioned making this cake for her husband this week and it sounded so good, I just had to try it.

It was quick and easy to make and, fortunately, I had all the ingredients at home.
.. well, almost, I didn't have 200g of 70% cocoa chocolate. I had one 60% bar (113g) and also used semi-sweet baking chocolate.

The result: first, you gotta love dark chocolate. The taste is powerful and, if you don't like dark chocolate, well, you won't like this. You can really feel it on the back of your tongue. The orange taste was also pretty strong (although my daughter says she couldn't taste it) but a good complement to the dark chocolate.

I do not like when recipes are not precise. In this case, the size of the pan was vague ("a large pan"). How big is a large pan? And is a large pan in France the equivalent of a small or medium pan in the US (you know, like fast-food portions)? So, I used a 10" pan...
Now, I knew from the comments on the recipe not to expect a high cake. However, this was really thin, as in between 1/2" and 3/4" thick. I understand that this was not a regular cake, there is no flour, but was the thickness due to the large pan or really all I could expect? If I used a smaller pan, would it make the cake higher or just prevent it from cooking thoroughly in the allocated time.
Picture
The texture of the cake was fantastic. It is very much like a mousse, light and fluffy. But, careful, the richness of the cake makes me wonder if having a thicker cake would really be a good idea or just become too overwhelming. I would suggest serving this maybe with a scoop of French vanilla ice cream, or at least whip cream.
Picture
Original recipe here.
Ingredients:
  • 200g dark chocolate (70%)
  • 1 orange (pick organic, since using the zest).
  • 5 eggs, separated
  • 50g butter
  • 10g cornstarch
  • 30g powdered sugar
  • 2 pinches of cinnamon

Preparation:
  1. Wash the orange thoroughly, zest it with a grater, squeeze the juice and keep everything aside.
  2. Break the chocolate in small pieces and melt it in a double-boiler (bain-marie).
  3. Melt the butter in the orange juice.
  4. In a large bowl, mix the sugar, cinnamon and cornstarch. Then add the egg yolks one at a time.
  5. Add the orange zest, then the chocolate, then the melted butter/orange juice.
  6. Beat the whites with a pinch of salt. Incorporate them little by little into the chocolate batter.
  7. Pour the batter in a buttered/floured large pan (see note above).
  8. Bake it for 20-25 minutes at 350 degrees.
  9. Let it cool before removing it from the pan.
  10. Decorate using powdered sugar, candied orange peels, grated chocolate...
Picture
Notes:
  • The surface of the cake was beautiful! I went for the quick and easy powdered sugar to decorate, but really, it was a shame to hide the beautiful surface.
  • I've mentioned the taste was very strong and not very sweet at all. If you prefer sweeter, try and modify the recipe to add more sugar OR


  • Try the recipe with milk chocolate (omit the orange zest and replace the orange juice with milk and cocoa powder). I don't know what the result would be but since there is more sugar in milk chocolate...

Let me know what you think... Does it look appetizing? Would you want to try it? Have you made something similar? Have you experimented with different pan sizes? What were the results?
0 Comments

Palmiers

1/12/2014

0 Comments

 
Picture
When I made the king cake last week (see previous post), I was left with some puff pastry dough, so I decided to make these little palmiers cookies. I just love them! And they were so easy to make too.

Preparation:
  1. Spread your dough in a long rectangle. The length doesn't matter but try to have about 8" in width. More than that and you end up with huge cookies (which might be what you want) but 8" gives you cookies that are about 2-3" big. Square the edges of your rectangle to make folding easier.
  2. Lightly spread sugar all over the surface of your rectangle. I used regular sugar, but you could use cinnamon sugar, maple sugar or brown sugar. The taste will be different, of course, so experiment.
  3. Now the folding. Fold length-wise. Fold both long edges so that they meet in the middle of the rectangle. You end up with a 4" wide rectangle.
  4. Spread some sugar all along the surface.
  5. Fold again length-wise, in the middle. You now have a 2" wide roll.
  6. Cut slices in the roll, about 1/2" wide. The length of the roll determines how many cookies you end up with.
  7. Roll the folded slices in sugar, then place flat on a parchment paper covered cookie sheet. The folding is what gives these cookies their heart shape.
  8. Brush some beaten egg onto the slices.
  9. Bake at 350 degree, about 20 minutes, until golden brown.
  10. Remove from baking sheet and let it cool on racks.
Picture
Special thank you to Sonia for taking the pictures. :-)
0 Comments

Galette des Rois (King Cake)

1/5/2014

1 Comment

 
Picture
It's tradition, on January 6th, we celebrate "Epiphany", the arrival of the three Wise Men to the Manger. We eat a special cake made with puff pastry and filled with almond cream or franchpane, a mix of almond cream and pastry cream. Inside the cake, a "fève", in my case a whole almond. Whoever gets it is king or queen for the day. It is a cute and fun celebration to do with friends or family.

This year, I had to make two "galettes", one for the family, of course, and one for a group of friends (French, Belgian and American). So, I decided to tackle the puff pastry from scratch instead of using the frozen stuff I've been using up until now. I was really afraid of that puff pastry, having heard it was so difficult and long to make.
The idea was to make both galettes from scratch, although I did have a pack of frozen puff pastry as a back up. Turns out, I made one of each.
Picture
First of all, for the puff pastry. I found this recipe for an easy puff pastry recipe and believe me, it was easy. Yes, a bit time consuming, but not as much as it normally is. And the result was a flaky puffy pastry, although not as puffy as the frozen ones. Most of the pictures (except one) on this post are of the frozen puff pastry one, I'll explain below.
Picture
For the almond cream recipe that I've been using for a few years, I use this recipe. Now, note that although the title of the recipe mentions franchpane, it is not actually franchpane. It is a very good almond cream and I think I will keep it for pie fillings (to use with fruits). It is a bit drier than the franchpane and not as sweet (although still sweet). It looked really good with the puff pastry, didn't it? It tasted good too.
Picture
For the franchpane, I used this recipe.  I discovered this blog at random and thought these individual galettes were just adorable. Please note that I made a HUGE rookie mistake while putting together my galette. Although the author of the recipe mentions that there will be more franchpane than needed, I thought it was because she was serving individual cakes. So, I used ALL the filling on my galette... I don't know what I was thinking but it resulted in lots of filling slipping out of the galette during baking (fortunately not the part with the whole almond), which in the end gave me a very lopsided and not very attractive galette. HENCE the lack of pictures. So, note for the future, there is enough cream here for TWO galettes. However, both the puff pastry AND the filling tasted fantastic!
Picture
Note that this puff pastry did not rise as much as the frozen pastry. Well, it did rise more than the picture shows but got flattened in the cutting. Only future experiments will tell if it was a problem and if it is due to user manipulation...
When tasting both galettes together, the one made completely from scratch and with franchpane is the winner hands down. It is really THE one for me now...
Picture
1 Comment

New Year Waffles

1/2/2014

2 Comments

 
Picture
In Belgium, it is the tradition to eat waffles on New Year's Day, a special kind of waffles. They are more cookie-like and are eaten as such, with no topping. The recipes vary from family to family but they are all very similar.
Although I make a double batch (about 80 waffles) and do give away a few (maybe a quarter), they never seem to last very long. Of course, I could make more but the beauty of tradition is to actually look forward to certain things only at certain times.

Picture
Ingredients:
  • 500g flour
  • 500g sugar
  • 4 eggs
  • 300g butter
  • 1 pkg vanilla sugar or 1 tsp vanilla extract
Preparation:
  1. Sift the flour.
  2. Make a well in the middle and put the sugar, egg yolks, softened butter (but in pieces) and vanilla sugar. Mix it all together.
  3. Beat the egg whites and delicately fold them in.
  4. Bake a spoonful of batter in a waffle maker (medium size squares).
Picture
Picture
Please note that the recipe above is from "Typiquement belge: Gaufres, crepes et galettes. Recettes et Traditions" (Editions Labor - 2006). This is not the exact recipe I used as mine is a family recipe passed down in my stepmother's family. She was kind enough to share her family recipe with me and we are all grateful for that :-D

2 Comments

Traditional Yule Log cake

12/28/2013

1 Comment

 
PictureBûche de Noël
'tis the season and with it, its delicious indulgences. One cannot help but look forward to this time of year and its traditions, especially the culinary ones, from bread, to cakes, pies or cookies.

Now, I'm not one of those who go crazy baking cookies... my last post about it was my latest attempt.
I like them, don't get me wrong, but I'm not into making dozens after dozens and giving them away to everyone and all that... Instead, I have my favorites, memories of my childhood, that I am now sharing with my daughter. She now looks forward to these traditions, even though she's not yet interested in learning how to make them.

The Yule Log cake is a French/Belgian tradition. It is a cake shaped like a log, to refer to the tradition of burning a huge log for the 12 days of the Christmas season (then called Yule). This was supposed to bring good luck for the year. A mix of pre-Christian and Christian traditions here, as is often the case.
Picture
If you go to a pastry shop in France or in Belgium, just before Christmas, you will have so many choices in yule log cakes, going from extremely traditional to avant-garde modern, to ice-cream cakes. Needless to say, it might be a traditional cake, but you will rarely experience twice the same one.
Picture
So, a few years ago, I started making my own yule log cake, which is a rolled cake with a filling and frosting made to look like a log. I've never made twice the same cake so far and some have been better than others, but they've all come out pretty good. This year's cake was particularly successful!

My daughter chose the flavors: chocolate and mint! So, off I went to the great internet to find recipes. I found a recipe for a mint and chocolate cake but didn't like the filling cream, so I just used their cake and syrup recipes. I made up my own recipe for the filling and the frosting (nothing fancy or too precise either).

Read More
1 Comment

Puff pastry cheese bites

12/26/2013

0 Comments

 
Picture
For Christmas dinner, I made some easy appetizers. They turned out delicious, even if some improvement is needed. I made two types of cheese bites, one with brie and one with goat cheese.

Ingredients:
  • 1 pack of puff pastry sheets (2)
  • goat cheese
  • brie
  • fig jam
  • honey
  • pecans
  • 1 egg yolk
  • water
Picture
Lesson learned:
  • Puff pastries PUFF, a lot... I forgot about this tip I use for tarts, where you prick the whole dough with a fork to prevent high rising. Definitely something to try next time.
  • It is very hard to find the correct amount of filling. You can't put too much, otherwise you won't be able to close the turnovers. But too little and the puff pastry overwhelms.
  • I put both batches (18 turnovers total) at the same time and after 20 minutes, they were still a bit pale. I did not have the option to keep them any longer, but will definitely bake them separately next time.
Preparation:
  1. Follow directions to let the pastry sheet thaw.
  2. Using a round cookie-cutter, cut as many circles as you can. I used a 3" round cookie cutter and ended up with 9 circles on each sheet.
  3. Preheat oven at 350 degrees.
  4. On half of the circles, place a bit of goat cheese and fig jam in the center of the circle. For the other half, place some brie with honey and pecan bits. Be careful not to put too much as you need to fold them in half.
  5. Brush some water all around the circles, fold them in half and press the edges to seal.
  6. Place them on the prepared baking sheets (I line the baking sheets with parchment paper).
  7. Brush the mini turnovers with the beaten egg yolk. Poke a hole in the pastry to allow for steam to escape.
  8. Bake for 15-20 minutes, until your pastries are golden.
Picture
Popularity result: They were a HUGE SUCCESS!!!! Especially with my teen! Definitely a must keep!
Picture
0 Comments

Crepes

12/25/2013

0 Comments

 
What a crazy week it's been, between a new full-time job, a weekend away with the family and well, the holidays... let's just say I do need many more hours in my days...  I did find the time to do some baking though and will share in the next couple days...
Picture
For her birthday, my daughter asked for some crepes. If you are not familiar with crepes, they are thin round pastries, similar to pancakes (but not really), served in a variety of ways.
You can make savory or sweet crepes and the recipes vary so much, you just need to figure out what you like.
The recipe I use is one I've been using since I was a child. My mother used it and it is so simple, much simpler than many recipes out there.

Ingredients (per person):
  • 100g of flour
  • 1 egg
  • 1 tbsp of sugar (ignore if making savory crepes)
  • milk
  • water
Picture
Picture
Serve with syrup, maple syrup, all kinds of sugars, jams, chocolate spread, etc.
Gives 4-5 crepes per person.
Preparation:
  1. Sift the flour in a large bowl.
  2. Add the sugar and the egg(s).
  3. Add water and milk in equal quantity until getting a bisque consistency.
  4. Use a round griddle (10"). Heat on high heat (drop a few drops of water on it to verify readiness -> if the water sizzles, your griddle is ready).
  5. Pour a ladle-full of batter onto the griddle. Lift and turn the griddle to spread the batter. 
  6. As soon as the batter is not runny anymore, lift the crepe with a knife or a spatula (or if you're better than me, a flick of your wrist) to flip the crepe to the other side.
  7. When cooked, put onto a plate.
  8. CAREFUL: the cooking goes WAY FASTER than for pancakes, a few seconds on each side.
Picture
0 Comments

Cookie Cake

12/15/2013

0 Comments

 
An easy project this week, a cookie cake. Special request from my daughter for her birthday celebration. I use an old recipe, meaning a recipe someone gave me years ago. From the photocopy, it comes from one of those wrappers around a piece of Wilton bakeware, you know, the ones that have recipes on the back. I have no idea where it came from other than that.
Picture
Ingredients:
  • 1/2 cup butter
  • 1/2 cup granulated sugar
  • 1/4 cup packed brown sugar
  • 1 egg
  • 3/4 tsp vanilla
  • 1 1/2 cups all-purpose flour
  • 1/4 tsp baking soda
  • 1/4 tsp salt
  • 1/2 cup semi-sweet chocolate chips

Preparation
:
  1. Preheat oven to 350 degrees. Spray pan with vegetable pan spray.
  2. In large bowl, cream butter with sugars.
  3. Add egg and vanilla and mix well.
  4. Stir in flour, baking soda and salt, mix well.
  5. Stir in chocolate chips.
  6. Spread dough into  prepared pan with spatula.
  7. Bake 15-20 minutes or until light golden brown.
  8. Cool on rack 5 minutes.
  9. Remove from pan. Cool before cutting and decorating.
  10. Makes 8-10 servings.

Picture
Additional notes:
  • I used royal icing to write on the cake. I had purchased tools to work with melted chocolate but used one of the small bottles for the icing. It actually was more comfortable to write with than a pastry bag.
  • The cookie cake's surface is of course very irregular, so do not expect miracles for the writing.
  • The shape of the cake is also irregular as I used a pretty big pan (a pizza pan) and the dough was a good 1.5 to 2 inches from the edges. The cookie did not expand much and reach the edges. Thus the irregular shape.
  • I baked it for 20 minutes. Next time, I'll probably lower the time to 17 minutes. Good color and good taste, not dry, but I wished for a bit more chewiness.
0 Comments

Vol-au-vent

12/8/2013

0 Comments

 
Picture
I have been following the French TV show “Le meilleur pâtissier” and a couple weeks ago, the theme was “puff pastry”. Inspired by it and in need of a quick dinner idea, I put together these vol-au-vent. I had some puff pastry sheets in my freezer, some chicken breasts, mushrooms and heavy cream and there you go. Friends have mentioned my recipe was not the traditional recipe of “vol-au-vent” such as any Belgian will understand it, but I made it with my favorite ingredients and what I had on hand.

Ingredients:
  • 1 pkg of puff pastry sheets (2 sheets per package)
  • chicken breast
  • mushrooms (fresh or canned)
  • 1 medium onion
  • butter
  • heavy cream

Tools:
  • Cookie cutters (3” round and 2” round – you can use a bit bigger too, but you need two different sizes)
Preparation:
  1. Spread the two sheets of puff pastry.
  2. On the first one, using the larger cookie cutter, cut as many circles as you can (I cut 9 with a 3” cutter). Repeat on the second sheet.
  3. Then, using the smaller cutter, cut the center off the second set of circles.
  4. Pick up the rings and using water, seal them on the circles from the first sheet.
  5. Then put the smaller circle back into the ring (no water to seal).
  6. Bake at 350º until puffed and golden-brown (about 10 minutes). Let them cool.

  1. Dice the chicken, onion and mushrooms in ½ inch cubes.
  2. Brown the chicken in a pan, set aside.
  3. Sauté the onion and mushrooms.
  4. Put all three ingredients back in the pan and add heavy cream.
  5. On low heat, reduce the cream to have a thick sauce.
  6. Fill each puff form with the mixture. You can also let the mixture “overflow” on the plate.
ENJOY!!!
0 Comments
<<Previous
Forward>>

    Enter your email address:

    Delivered by FeedBurner

    RSS Feed

    Table of Content

    Articles listed by date (available soon)

    Archives

    October 2014
    March 2014
    February 2014
    January 2014
    December 2013
    November 2013
    October 2013
    September 2013
    August 2013
    July 2013
    June 2013

    Categories

    All
    Almond Cream
    Apples
    Apple Sauce
    Banana
    Basic Cake
    Bread
    Brownies
    Cake
    Cannoli
    Caramel
    Chocolate
    Cinnamon
    Coconut
    Cookies
    Crepes
    Cupcakes
    Filling
    Frosting
    Fruit
    Icing
    Louisiana
    Madeleine
    Mardi Gras
    Meringue
    Mousse
    Muffins
    Orange
    Pastry Cream
    Pie
    Pop
    Pudding
    Puff Pastry
    Puff Pastry
    Savory
    Shortbread
    Specialty Bread
    Strawberry
    Sugar
    Tartlet
    Vanilla Cream
    Waffles
    Whip Cream
    Zucchini

    Author

    My name is Anne-Sophie and I've always enjoyed baking. I've decided to try and spend more time trying new recipes and would like to share the journey. I am particularly (but not exclusively) interested in French/Belgian recipes.


Powered by Create your own unique website with customizable templates.